Applying Custom Symmetry
Built in commands in the Pose Symmetry menu allow you to quickly apply symmetry to arms, legs, and torso. However, the built-in Symmetry commands allow you to operate on arms only, legs only, or an entire side of the body The Custom Symmetry dialog allows you to selectively apply symmetry on any body part, and to apply symmetry across a specified number of frames in an animation.
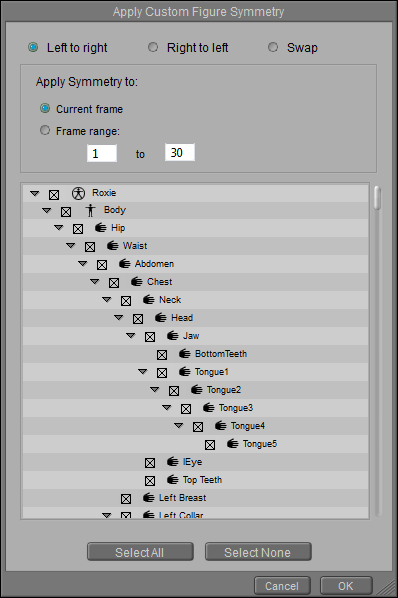
Choose Figure > Pose Symmetry > Custom to open the Apply Custom Figure Symmetry dialog. This dialog allows you to select body parts on which symmetry can be applied. The options in the Apply Custom Figure Symmetry dialog are as follows:

Apply Custom Figure Symmetry dialog.
- Left to Right: Choose this option to apply the values from the left side of the figure to its right side.
- Right to Left: Choose this option to apply the values from the right side of the figure to its left side.
- Swap: Swaps the values from the left side to the right side, and vice versa.
- Apply Symmetry To: Allows you to specify which frame or frames to apply the symmetry command to.
- Current Frame: Applies the custom symmetry settings to the frame that you are currently viewing in the document window.
- Frame Range: Applies the custom symmetry settings to a specified range of frames. All frames in your current project are entered by default. For a specific range of frames, enter the start frame and end frame in the fields provided.
- Hierarchy Window: Check or uncheck the body parts that you want to include in your Custom Symmetry action.
- Select All: Selects all items in the hierarchy list.
- Select None: Deselects all items in the hierarchy list. Allows you to ensure that all items are deselected before you select specific items to include.
- Cancel: Exits the Apply Custom Figure Symmetry dialog without applying the settings.
- OK: Click to apply your choices to the selected figure.