Creating a Fitting Simulation
After you add the clothing and figure to your scene, click the Fitting tab to enter the Fitting Room. At this point, the first step is to create a fitting session, which basically identifies the clothing item that you want to fit, and the character that you want to fit it to.
To create a new fitting session, follow these steps:
- With the character and clothing loaded into your scene, click the Fitting tab to switch to the Fitting Room.
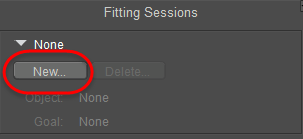
- Click the New button at the top of the Fitting Sessions palette.

Click the New button to create a fitting session.
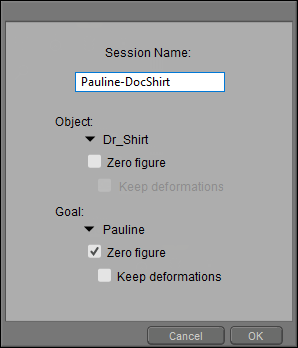
- In the Session dialog, complete the following:
- Name: Enter a name for the clothing fitting session.
- Object: Expand the Object list to select the clothing item that you want to fit to the character.
Check the Keep Deformations option for the Object if you applied morph targets or other deformers to the clothing in the Pose Room. For example, if you added magnets or applied a morph that raises or lowers the hem of a skirt, you can check the Preserve Deformations option to bring the skirt into the Fitting Room with that length.
Uncheck the Zero Figure option for the Object if you have made any rotation adjustments to the clothing to match the default pose of the character, as discussed in Adjust Scale, Position, and Rotation.
It is standard practice for content developers to zero their figures (scale, position, and rotation) and then memorize those settings before saving the item to the library. However, sometimes this step is omitted, which can result in a non-zeroed figure being saved to the library. Checking the Zero Figure option can address conformers that have not been zeroed before adding them to the library.
- Goal: Expand the Goal list to select the character that you want to fit the clothing to.
Check the Keep Deformations option for the Goal if you applied morph targets or other deformers to the character in the Pose Room. For example, if you want to fit the clothing to a specific full body morph (such as Pregnant, or Body Builder) you can check this option to load the character into the Fitting Room with that body shape instead of the default body shape.
Uncheck the Zero Figure option f you have made any rotation adjustments to the figure.

Select the Object (clothing item) and Goal (character).
- Click OK. The clothing and character will appear in the Fitting Room as Poser unimeshes.