Color
BrightContrast
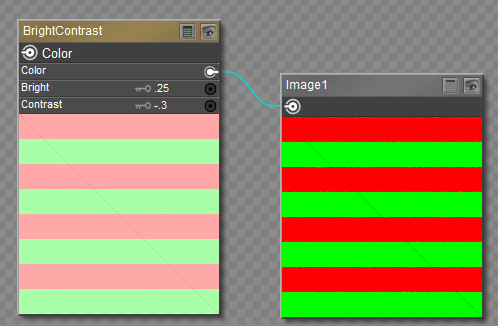
Cycles BrightContrast node.
Inputs:
- Color: Input texture to be corrected.
- Bright: A multiplier. Positive values increase the overall brightness of the image. Negative values darken the image
- Contrast: A scaling factor that makes brighter pixels brighter but keeps darker pixels dark. Higher values make details stand out. Negative numbers decrease the overall contrast in the image.
Outputs:
- Color: Adjusted color output.
Gamma
Correct lighting issues (such as light attenuation with distance, light falloff at terminators, and light and shadow superpositions). Gamma correction corrects similarly to how digital cameras correct photos. In other words, gamma correction is 0.45, not 2.2.
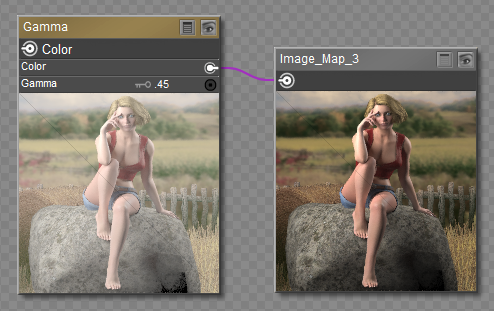
Cycles Gamma node.
Inputs:
- Color: Input texture to be corrected.
- Gamma: Enter an exponential brightness factor for correction.
Outputs:
- Color: Adjusted color output.
HSV
Changes the Hue, Saturation, and/or Value of a color or an image.
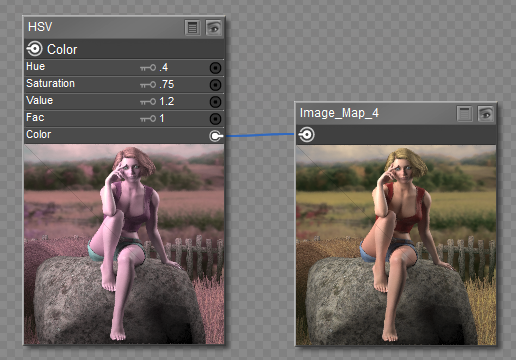
Cycles HSV node.
Inputs:
- Hue: Enter the desired adjustment factor for changing the Hue. The values of 0 to 1 represent a 360 degree rotational shift. A value of .5 produces no hue change. Entering 0 represents -180 degree rotation, and entering 1 represents 180 degree rotation, resulting in the same color shift.
- Saturation: Enter the desired adjustment factor for changing the Saturation. A value of 0 completely desaturates the image, turning it to grayscale. A value higher than 1 increases image saturation.
- Value: Enter the desired adjustment factor for changing the Value (brightness) of the image. Decrease the value to darken, increase the value to lighten.
- Fac: Enter the desired strength of the adjustment.
- Color: Input texture to be corrected.
Outputs:
- Color: Adjusted color output.
Invert
Inverts every pixel. Most commonly used to invert grayscale images.
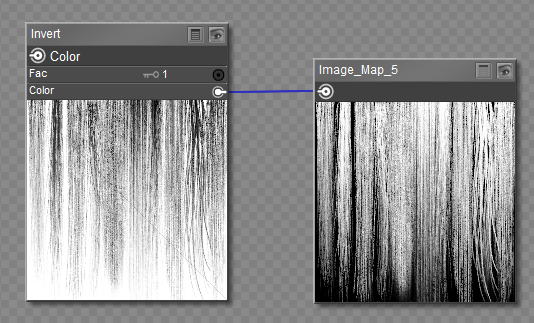
Cycles Invert node.
Inputs:
- Fac: The strength of the inversion from 0 (no inversion) to 1 (full inversion). A value of .5 outputs a gray color.
- Color: The color or texture to be inverted.
Outputs:
- Color: Adjusted color output.
LightFalloff
Manipulates how light intensity decreases over distance. Output is in grayscale information. Realistic lighting falls off quadradically.
NOTE: Using Linear or Constant falloff may introduce more light with each global illumination bounce and make images very bright if many bounces are used.
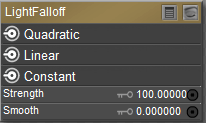
Cycles LightFalloff node.
Inputs:
- Strength: Light strength before applying falloff modification.
- Smooth: Smooth intensity of light near light sources. This can avoid harsh highlights, and reduce global illumination noise. For no smoothing, enter 0. Higher values smooth more.
Outputs:
- Quadratic: Quadratic light falloff; leaves strength unmodified if smooth is 0.0 and corresponds to reality.
- Linear: Linear light falloff; gives slower decrease in intensity over distance.
- Constant: Constant light falloff, where the distance to the light has no influence on its intensity.
Linear or Constant falloff may cause more light to be introduced with every global illumination bounce, making the resulting image extremely bright if many bounces are used.
Mix
Mixes two inputs together. Mixing can be used for material layering.
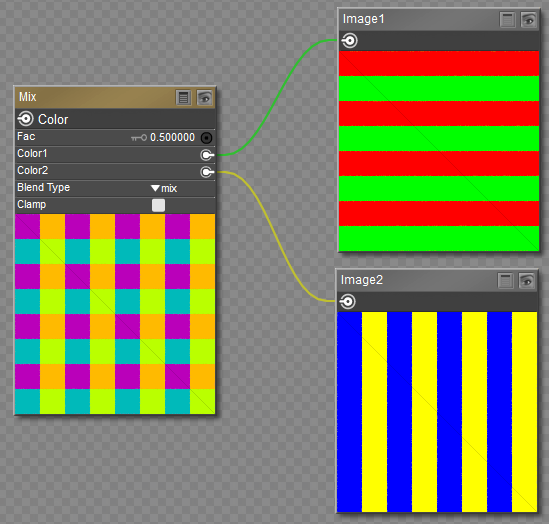
Cycles Mix node.
Inputs:
- Fac: The amount of mixing between the two shaders. Low values increase the effect of Color1. High values increase the effect of Color2.
- Color1: Color or texture input #1
- Color2: Color or texture input #2
- Clamp: Restricts the output range to values between 0 and 1.
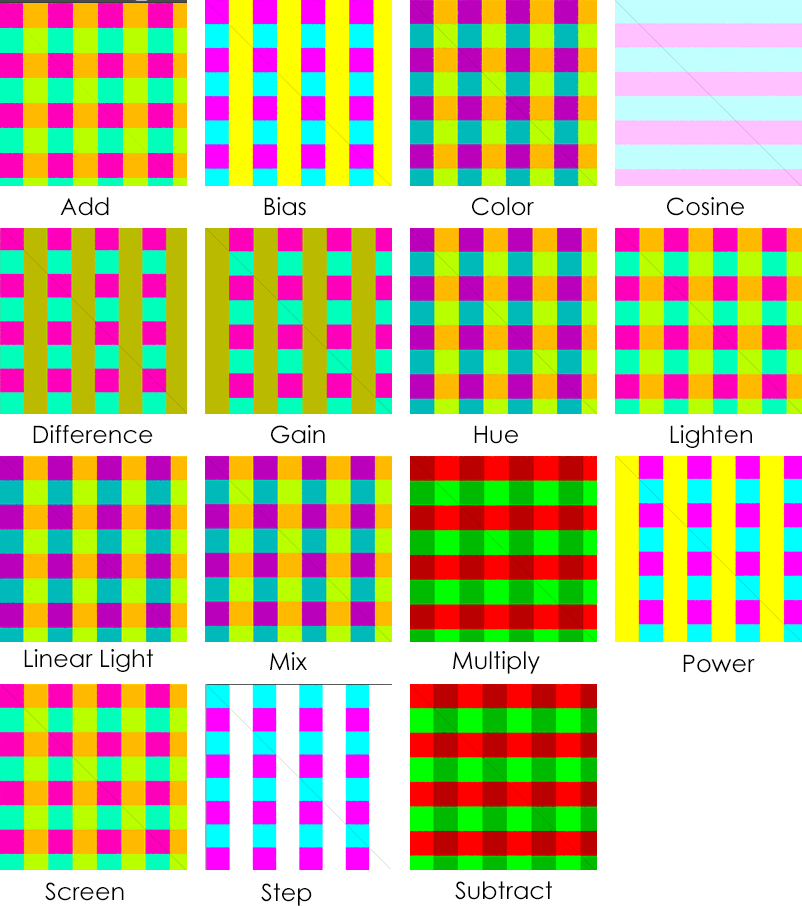
- Common Blend Types:
- Add: Adding blue to blue keeps it blue, but adding blue to red makes purple. White already has a full amount of blue, so it stays white. Use this to shift a color of an image. Adding a blue tinge makes the image feel colder.
- Burn: Burn mode inverts the pixel value of the lower layer, multiplies it by 256, divides that by one plus the pixel value of the upper layer, then inverts the result. It tends to make the image darker, somewhat similar to “Multiply” mode.
- Color:
- Darken: With the colors set here, it’s like looking at the world through rose-colored glasses.
- Difference: It takes out a color. The color needed to turn Yellow into White is Blue. Use this to compare two very similar images to see what had been done to one to make it the other; sort of like a change log for images. You can use this to see a watermark you have placed in an image for theft detection.
- Divide: Divide mode multiplies each pixel value in the lower layer by 256 and then divides that by the corresponding pixel value of the upper layer plus one. (Adding one to the denominator avoids dividing by zero.) The resulting image is often lighter, and sometimes looks “burned out”.
- Dodge: Dodge mode multiplies the pixel value of the lower layer by 256, then divides that by the inverse of the pixel value of the top layer. The resulting image is usually lighter, but some colors may be inverted.
- Hue: Shows you how much of a color is in an image, ignoring all colors except what is selected: makes a monochrome picture (style ‘Black & Hue’).
- Lighten: Like bleach makes your whites whiter. Used with a mask to lighten up a little.
- Linear Light:
- Mix: Combines the two images, averaging the two.
- Multiply: Black (0.0) times anything leaves black. Anything times White (1.0) is itself. Use this to mask out garbage, or to colorize a black-and-white image.
- Overlay: Overlay mode inverts the pixel value of the lower layer, multiplies it by two times the pixel value of the upper layer, adds that to the original pixel value of the lower layer, divides by 255, and then multiplies by the pixel value of the original lower layer and divides by 255 again. It darkens the image, but not as much as with “Multiply” mode.
- Saturation: Low values desaturate the image, and make it more grayscale. Higher values oversaturate the colors in the image.
- Screen: Screen mode inverts the values of each of the visible pixels in the two layers of the image. (That is, it subtracts each of them from 255.) Then it multiplies them together, divides by 255 and inverts this value again.
- Soft Light: Soft light tends to make the edges softer and the colors not so bright. It is similar to “Overlay” mode.
- Subtract: Taking Blue away from white leaves Red and Green, which combined make Yellow. Taking Blue away from Purple leaves Red. Use this to desaturate an image. Taking away yellow makes an image bluer and more depressing.
- Value: Lower values darken the image, while higher values lighten the image.
- Comparison Types:
- Sign: Extracts the sign of Color1. All positive numbers will output 1.0. All negative numbers will output -1.0. And 0.0 will output 0.0
- Function Types:
- Absolute: Color1 is read with without regard to its sign. This turns negative values into positive values.
- Exp: Raises Euler’s number to the power of Color1
- Logarithm:
- Power:
- Sqrt: The square root of Color1
- Rounding Types:
- Ceil: Rounds Color1 up to the nearest integer
- Floor: Rounds Color1 down to the nearest integer
- Modulo: Outputs the remainder once Color1 is divided by Color2
- Round: Rounds Color1 to the nearest integer
- Trigonometric Blend Types:
- Cosine: The Cosine of Color1
- Sine: The Sine of Color1
- Tangent: The Tangent of Color1
- Poser-Specific Types:
- Bias: Takes two values, each between 0 and 1. Color1 is the input to be mapped (such as an image). Color2 is a bias factor that pushes the range of the input values toward 0 or 1. A bias of 0 is all black; .5 is no change; 1 is all white.
- Gain: Gain: Similar to bias, but Color2 is applied as an exponent around the center value so that the center stays locked. Smaller values lighten the image, and values higher than .5 darken the image.
- Smoothstep: Smoothstep: Takes a single value (Color1) and returns a mapped value as if the step function is smooth between 0 and 1. A value of .5 stays in place. Other values will smoothly transition using a hermite curve.
Cycles Mix examples.
Outputs:
- Color: Adjusted color output.
