Kitty3 Base Textures-Physical
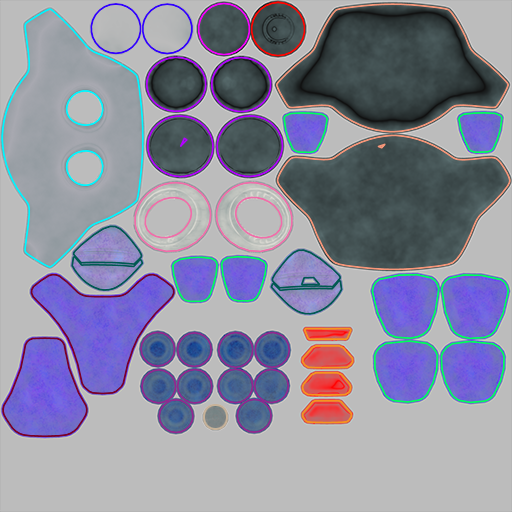
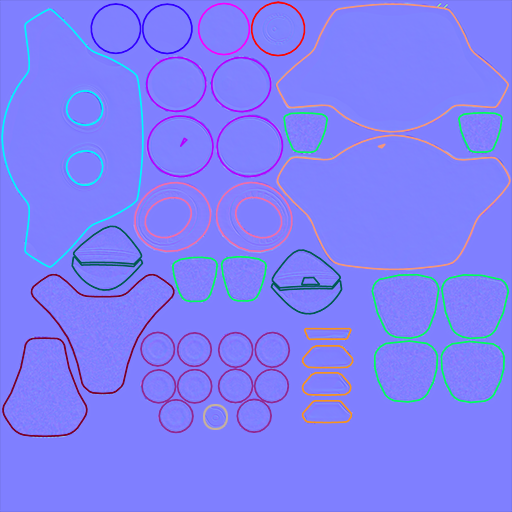
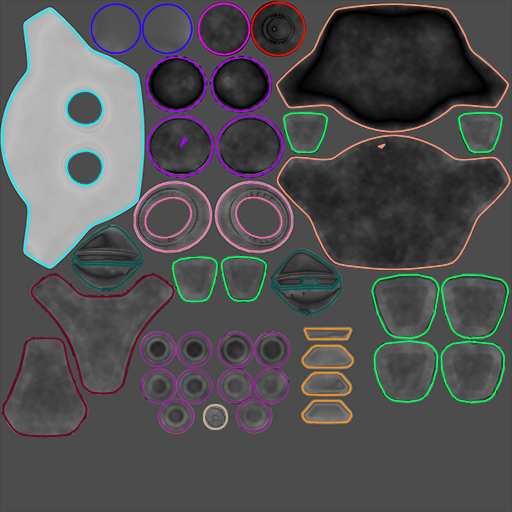
The material zones included in the "Kitty3" maps are as follows.
- Bolts: (Associated polygons outlined in beige for clarity) - Worn Steel
- DetalColor1:(Associated polygons outlined in dark purple for clarity) - Solar Panel Blue
- DetalColor2: (Associated polygons outlined in green for clarity) - Solar Panel Violet
- DetalColor3: (Associated polygons outlined in dark green for clarity) - Solar Panel Light Purple
- DetalColor4: (Associated polygons outlined in deep red for clarity) - Solar Panel Medium Purple
- Eye Frame: (Associated polygons outlined in medium pink for clarity) - Polished Chrome
- Eye Glass: (Associated polygons outlined in red for clarity) - Clear glass
- Eye Glow: (Associated polygons outlined in blue for clarity) - Yellow Emissive
- Eye Inner:(Associated polygons outlined in dark pink for clarity) - Yellow Emissive
- Eye Shield: (Associated polygons outlined in purple for clarity) - Gray Glass
- Face: (Associated polygons outlined in cyan for clarity) - Carpet Velvet
- Face Shield: (Associated polygons outlined in orange for clarity) - Gray Glass
- LED: (Associated polygons outlined in mustard yellow for clarity) -- Red Emissive
| Color Map | Normal Map | Roughness Map |
 |
 |
 |
If you still have textures in your clipboard from the previous section you can use those instead of performing the following three steps. Continuing from Kitty2 Base Textures-Physical:
- Choose one of the materials that you created and copy the nodes into your clipboard.
- Right-click an empty space in the Edit window and choose Select All to select all of the nodes. Then right-click again and choose Copy to place them in your clipboard.
- Select the Bolts material from the Materials list above the Edit window. Right-click to select the contents that are already there, and choose Replace to paste the nodes from the clipboard.
After the nodes are in your clipboard you need to modify this material so that it uses the correct textures:
- Click the Image Source field for the Color map, and change the texture reference to SAKitty3_Color. Leave the Gamma set to Use Gamma value from Render Settings.
- Click the Image Source field for the Roughness map, and change the texture reference to SAKitty3_Roughness. When you reassign the texture, the Gamma value will change to Use Gamma value from Render Settings. Change this to Custom Gamma Value of 1.
- Click the Image Source field for the Normal map, and change the texture reference to SAKitty3_Normal. When you reassign the texture, the Gamma value will change to Use Gamma value from Render Settings. Change this to Custom Gamma Value of 1.
- Now that you have the correct base texture maps assigned for the Bolts material, you'll need to copy the shader to the other materials that use Map 3. Right-click an empty space, and choose Select All to copy the nodes to your clipboard.
- One at a time, select the following materials from the Materials list. Right-click and choose Select All to select the existing nodes, then right-click again and choose Replace to update them with the nodes in your clipboard:
- DetalColor1: Solar Panel Blue
- DetalColor2: Solar Panel Violet
- DetalColor3: Solar Panel Light Purple
- DetalColor4: Solar Panel Medium Purple
- Eye Frame: Polished Chrome
- Eye Glass: Clear glass
- Eye Glow: Yellow Emissive
- Eye Inner: Yellow Emissive
- Eye Shield: Gray Glass
- Face: Carpet Velvet
- Face Shield: Gray Glass
- LED: Red Emissive
- Continue to Kitty2 Metallic Map-Physical