Using the Hierarchy Editor
To display the Hierarchy Editor palette, select Window > Hierarchy Editor.

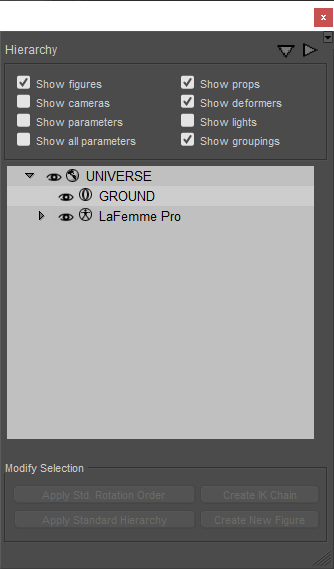
The Hierarchy Editor.
The Hierarchy Editor palette allows you to:
- Select scene elements. Selecting an element in the Hierarchy Editor palette selects that item in the Document, Current Actor pull-down, and Graph palette.
- Access object properties. Double-clicking an object listing in the Hierarchy Editor palette opens the Properties palette for the selected item.
- Quickly hide or view scene elements.
- Rename or delete elements and parameters such as morph targets or Point At parameters. Use caution, as this is a very powerful and very permanent change.
- Set up or change parent-child relationships for props.
- Set up Inverse Kinematics (IK) chains.
- Change rotation orders for props or body parts.
- Create new figures using a legacy method (Poser 4 and earlier) of dragging objects into the scene and arranging them in a hierarchical order, after which the Create New Figure button was pressed. This method has since been replaced with the Poser Setup Room, discussed in The Setup Room.
- Expand or contract the hierarchy list to view parents and children or parents only. Click a right arrow to expand a portion of the tree, or a down arrow to collapse a branch.
- Clicking the down and right arrows in the upper-right corner of the hierarchy window will collapse or expand the entire tree in the hierarchy editor.