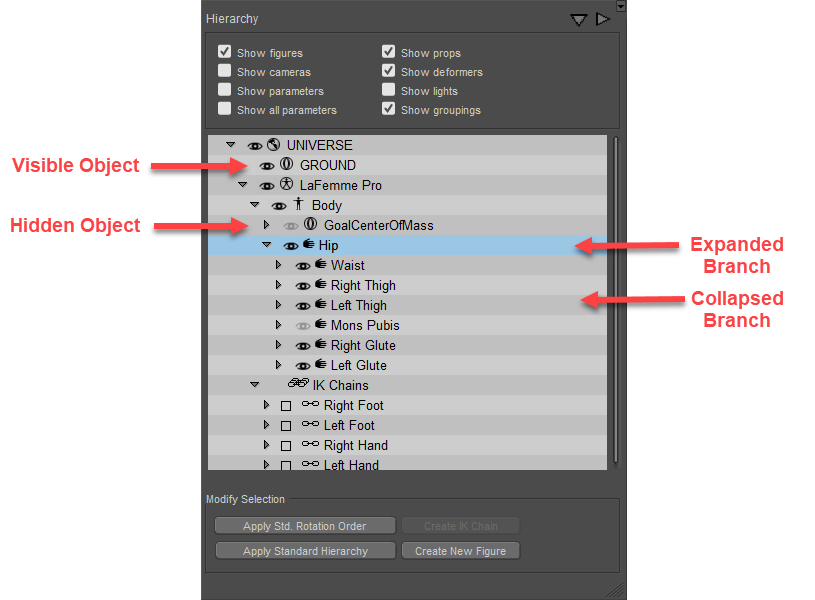
Working with Hierarchy Branches
You can perform the following basic actions using the hierarchy listing:
- To expand a hierarchy branch, click the right-pointing arrow next to the branch you wish to expand.
- To collapse a hierarchy branch, click the downward-pointing arrow next to the branch you wish to collapse.
- To expand or collapse items to their top level, use the Down and Right arrows in the upper right section of the Hierarchy Editor window.
- To select an object, click its listing.
- To make an object visible or invisible, click the eye next to the desired icon. The eye appears bright white when an object is visible and gray when invisible.
- To view the Properties palette for an object, double-click the selected object’s listing.
- To delete a figure, prop, or light from your scene, select the item to delete then press [DEL]. You cannot delete body parts, cameras, or the ground plane. You can also delete the selected item by right-clicking inside the Hierarchy Editor and choosing Delete Selected from the popup menu. If you choose to delete a figure, the confirmation dialog will present an option to delete attached figures (clothing that is conformed to the figure). After you make your choice, choose OK.
- To rename an object, click on its listing once to select it, and then a second time to open a text box. (Do not simply double-click on the listing, as this will open the Properties palette for that object.) Enter the object’s new name in the text box.

Elements of the Hierarchy Editor.