Painting Bulge Maps
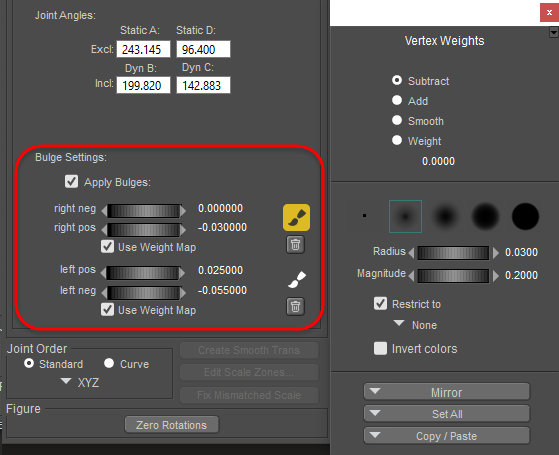
You’ll notice that there are also paint palette icons near the right and left bulges. For certain body parts, you’ll have to paint both to get the correct feel for how bulges affect the joints.

Bulge map weight painting controls.
As you work with a joint, you may need to switch between the weight map on the joint, and the weight map on its bulges.
If your weight painting gets to a point where the joint weight map starts to look unnatural, try adding or removing from the bulge weight map. Then, if the bulge weight map starts to look unnatural, return to the joint weight map. Switch back and forth between them until the joint looks natural when it is rotated.
- When working on bulge weights, the brush affects the weight map a little bit differently. A setting of .01 on a bulge map has a similar effect to a setting of .001 on a weight map. Use a setting of .01 on a bulge map for a nice, smooth workflow.
- Bulge settings must be set to a value other than 0 in order to use a bulge map. For any bulges that you want to use (Right Neg, Right Pos, Left Pos, or Left Neg), set to a value less than or greater than 0. The Right Neg and Right Pos share the same map, and the Left Neg and Left Pos share the same map.
- Be sure to rotate the dial to its positive and negative positions, and check the bulge weights in both. For example, if you use a bulge on the right collar when the Up/Down dial is at a positive setting, make sure that the joint still looks realistic when the dial is at a negative value.