Weight Painting Tips
-
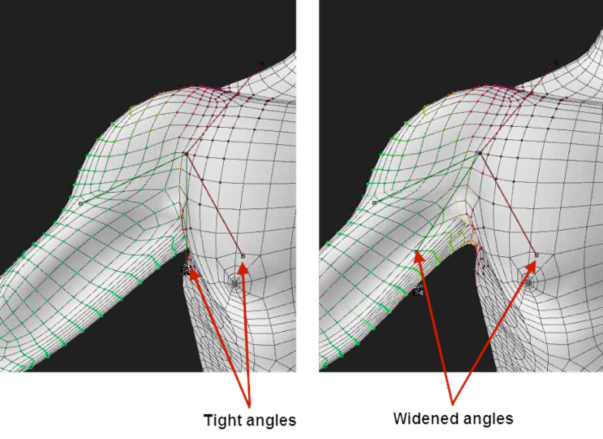
- There are times that the area between an inclusion and an exclusion angle is very narrow when a joint is rotated to its maximum limit. It is very difficult to get into that area with the weight painting tool to smooth it out. The trick is to widen the distance between the inclusion and exclusion angle so that the body part “plateaus.” Then you can use the Weight Painting tool to shape the body part appropriately.

Adjust inclusion angles when weight painting a joint in its maximum limits.
- Another thing that will help as you use the weight painting tools is to select your camera, and then go into the Parameters palette. Set the Hither setting to 0. This will allow you to zoom in as close as you have to without making the object “disappear” in the camera view.
- The Frame_Selected and Orbit_Selected controls will also be helpful when weight painting. Click to select the joint you are working on, and then click the Frame Selected control to frame the camera around the selected body part. Then turn Orbit Selected so that the camera will orbit around that part.