Shader
Contents
AbsorptionVolume
This node allows light to be absorbed as it passes through the volume. Typically used for water and colored glass.

Cycles AbsorptionVolume node.
Inputs:
- Color: The color that is absorbed.
- Density: The amount of light that interacts with the volume (how much is absorbed and how much passes through). Values of 0 produce no volume. Values above 0 increase the amount of volume.
Outputs:
- Volume: Plug this output into the Volume input of the Cycles root node.
AddClosure
Add two shaders together. Mixing can be used for material layering.

Cycles AddClosure node.
Inputs:
- Closure1: First shader to add
- Closure2: Second shader to add.
Outputs:
- Closure: The mixed output of the two input shaders.
AmbientOcclusion
Ambient occlusion darkens shadow effects in gaps and crevices. With this option it’s possible to let only some materials be affected by AO, or to let it influence some materials more or less than others. This can be used to add weathering effects to corners only.
This shader is resource intensive and can slow down rendering times significantly. Adding a Geometry node with Pointiness setting, or baking Ambient Occlusion will make rendering faster.
The current implementation of OptiX does not support the use of the AmbientOcclusion node in shaders. If you need to use Ambient Occlusion you will need to use a different hardware rendering option.
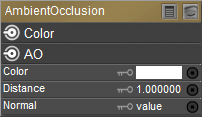
Cycles AmbientOcclusion node.
Inputs:
- Color: Defines the tint color of the AO output (areas that are not occluded).
- Distance (Cycles only): Maximum distance that other objects are considered to occlude the shading point.
- Normal: The normal used for ambient occlusion. If nothing is connected, the default shading normal is used.
Outputs:
- Color: Ambient occlusion with color tint.
- AO: Ambient occlusion factor without color tint.
AnisotropicBsdf
Used to add a glossy reflection, with separate controls over U (horizontal) and V (vertical) direction roughness. The tangents are derived from the active UV map. If no UV map is available, the tangents are generated automatically using spherical mapping based on the mesh's bounding box.
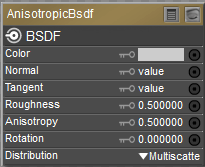
Cycles AnisotropicBsdf node
Inputs:
- Color: Defines the color of the surface.
- Normal: Connection for a normal map. If nothing is connected, the default normal shader will be used.
- Tangent: Tangent used for reflections; The default tangent will be used if nothing is connected.
- Roughness: The sharpness of the reflection, with 0 being completely sharp and higher values being smoother
- Anisotropy: A value of 0 gives a rounder highlight. Higher values make the highlight elongated along the tangent.
- Rotation: Rotation of the anisotropic tangent direction. Values from 0 to 1 represent 0 to 360 degrees. For example, a value of 0.0 is 0 degrees, .25 is 90 degrees, and so on). Used to texture the tangent direction.
- Distribution: The type of microfacet distribution to use. Choices are Beckmann, GGX and Ashikhmin-Shirley.
Inputs:
- BSDF: Standard shader output.
DiffuseBsdf
Adds Lambertian or Oren-Nayar diffuse reflection.

Cycles DiffuseBsdf node.
Inputs:
- Color: Defines the color of the surface (the probability that light is reflected or transmitted for each wavelength).
- Normal: Connection for a normal map. If nothing is connected, the default normal shader will be used.
- Roughness (Cycles only): Surface roughness. Lower values make the surface more rough (value of 0 gives standard Lambertian reflection). Higher values make the surface more smooth (Oren-Nayar BSDF).
Outputs:
- BSDF: Standard shader output.
Emission
Used for light that emits from meshes. Used to add Lambertian emission.
Light strength for point, spot, and area lights is specified in Watts.

Cycles Emission node.
Inputs:
- Color: Color of the emitted light
- Strength: Strength or intensity of the emitted light. Unit is in watts for point and area lights. For materials, a value of 1.0 will ensure that the object in the image has the exact same color as the Color input.
Outputs:
- Emission: Plug this output into either a Surface input or the Volume Input of a material output node.
GlassBsdf
Glass-works similar to the transparent shader. Pure white makes it transparent. The glass shader tends to cause noise due to caustics. It helps to combine this with a transparent shader for shadows.
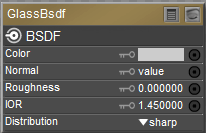
Cycles GlassBsdf node.
Inputs:
- Color: Defines the amount of transparency. White is fully transparent. Black is fully opaque.
- Normal: Connection for a normal map. If nothing is connected, the default normal shader will be used.
- Roughness: Influences sharpness of the refraction. A value of 0 is perfectly sharp. Higher values blur the reflections and transmissions.
- IOR: Index of refraction defining how much the ray changes direction. At 1. 0 rays pass straight through like transparent; higher values increase the amount of refraction.
- Distribution: Microfacet distribution to use. Sharp results in perfectly sharp refractions like clear glass, while Beckmann and GGX can use the Roughness input for rough or frosted glass.
Outputs:
- BSDF: Standard shader output.
GlossyBsdf
Glossy reflection with microfacet distribution, used for materials such as metal or mirrors.
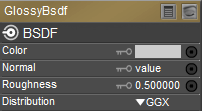
Cycles GlossyBsdf node.
Inputs:
- Color: Defines the color of the surface.
- Normal: Connection for a normal map. If nothing is connected, the default normal shader will be used.
- Roughness: Perfectly glossy at 0.0. Increase the settings to make reflections softer/blurrier.
- Distribution: Defines the type of microfacet distribution to use. Sharp results in perfectly sharp reflections like a mirror (roughness will not apply in this mode). Beckmann, GGX and Ashikhmin-Shirley (all Cycles Only) use the Roughness input to soften/blur reflections.
Outputs:
- BSDF: Standard shader output.
HairBsdf
Used to add shading for Hair.
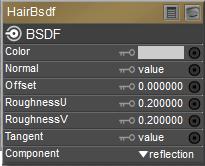
Cycles HairBsdf node.
Inputs:
- Color: The color of the hair.
- Offset: Affects the angle of the“gap” between the hairs.
- RoughnessU: Determines the amount of glossiness along the length of the hair.
- RoughnessV: Determines the amount of glossiness along the width of the hair.
- Tangent: Input tangent.
- Component: Choose Reflection to set attributes for the hair surface, or Transmission to control how light passes through the hair.
Outputs:
- BSDF: Standard shader output.
Holdout
Holds the surface from being exposed to the camera. Creates a transparent “hole” with zero alpha transparency in the render. This is useful for compositing.

Cycles Holdout node.
Inputs:
none
Outputs:
- Holdout: Standard shader output.
MixClosure
Mix two shaders together. Mixing can be used for material layering.

Cycles MixClosure node.
Inputs:
- Fac: Blend weight to use for mixing two shaders. A value of 0 uses the first shader entirely. A value of 1 uses the second shader entirely. Input can be from a blend weight node.
- Closure1: First shader to mix
- Closure2: Second shader to mix.
Outputs:
- Closure: Standard shader output.
PrincipledBsdf
See Using the PrincipledBsdf Node
PrincipledHairBsdf
Used for rendering strand-based hair and fur, as created in Poser's Hair room.
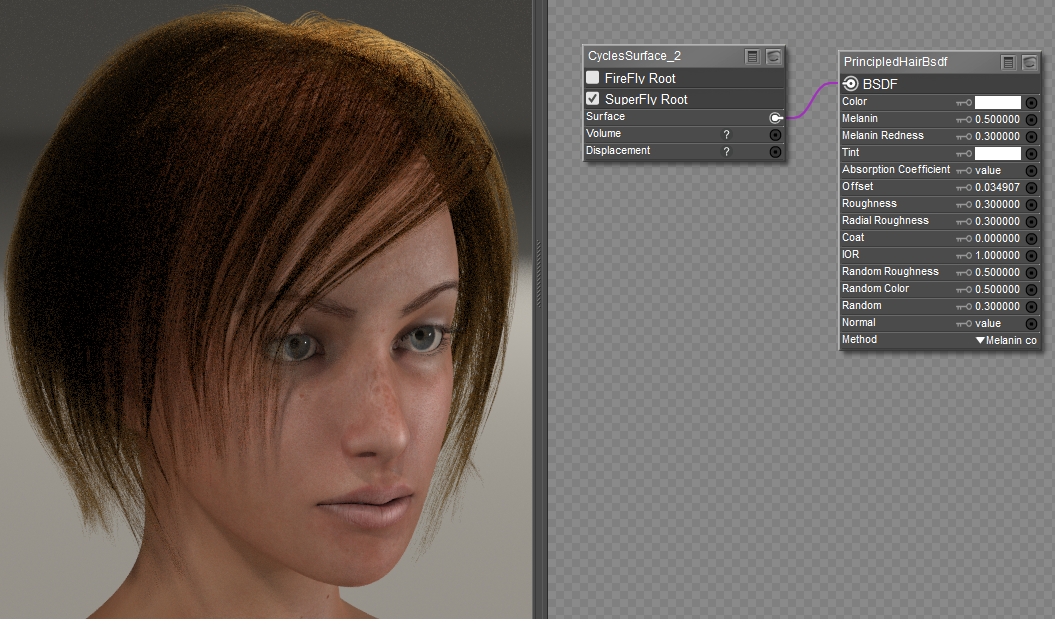
Inputs:
- Color: The RGB color of the strand. Only used in Direct coloring.
- Melanin: The absolute quantity of pigment, with 0-1 values relating to 0-100%. A value of 0 (or 0%) = white hair. A value of .25 (25%) is for light blonde hair. A value of .5 (or 50%) results in reddish hair color. A value of .75 (or 75%) is brown hair. A value of 1 (or 100%) results in black hair. See also Melanin Concentration, below.
- Melanin Redness: Defines the ratio between pheomelanin (red or yellow hair pigments) to eumelanin (black or brown hair pigments). Values of 0-1 correspond to 0-100%.
- Tint: The color that tints (or dyes) the hair after melanin is applied. Set to white for no tint.
- Absorption Coefficient: Attenuation coefficient.
- Offset: Tilts the glint of the hair by increasing the angle of the scales of the hair’s cuticle with respect to the hair shaft. Human hair usually has low values.
- Roughness: How much the glints are smoothed in the direction of the hair shaft. Too low values will smoothen the hair to the point of looking almost metallic, making glints look like Fireflies; while setting it too high will result in a Lambertian look
- Radial Roughness: How much the glints are smoothed in the direction of the hair tangent. Too low values will concentrate the glint; while setting it too high will spread the light across the width of the strand.
- Coat: Simulates a shiny coat of fur. Reduces the Roughness factor for the first light bounce by a percentage of the original roughness setting. Values of 0-1 correspond to 0-100%.
- IOR: Index of refraction defining how much the ray changes direction. At 1.0 rays pass straight through like in a transparent material; higher values give more refraction.
- Random Roughness: For each strand, randomizes both Roughness values. Settings of 0-1 correspond to 0-100% randomness.
- Random Color: For each strand, randomizes the melanin concentration. Settings of 0-1 correspond to 0-100% randomness.
- Random: Random number source used if no node is connected here.
- Normal: A tuple input representing X, Y, and Z values respectively.
- Method:
- Direct Coloring: Choose the desired RGB color and the shader will approximate the necessary absorption coefficient (below)
- Melanin Concentration: (see also Melanin and Melanin Redness, above). Defines the quantity and ratio of pigments found in hair and fur. The Melanin input defines the quantity, and the Melanin Redness defines the ratio between light and dark hair colors.
- Absorption Coefficient: This mode is intended mainly for technical users who want to use coefficients from the literature without any sort of conversion.
Outputs:
- BSDF: Standard shader output
PrincipledVolume
Combines all volume shading compents into a single node. Includes scattering, absorption, and blackbody emission. Useful for smoke and fire.
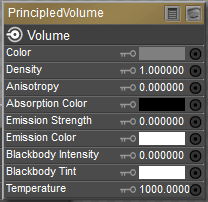
Cycles PrincipledVolume node.
Inputs:
- Color: Volume scattering color. Use this for smoke simulations.
- Color Attribute: Volume grid for coloring the volume.
- Density: Density of the volume.
- Density Attribute: Volume grid to define the density.
- Anisotropy: Backward or forward scattering direction.
- Absorption Color: Volume shadow color tint.
- Emission Strength: Amount of light to emit.
- Emission Color: Emission color tint.
- Blackbody Intensity: Blackbody emission for fire. Set to 1 for physically accurate intensity.
- Blackbody Tint: Color tint for blackbody emission.
- Temperature: Temperature in kelvin for blackbody emission.
Outputs:
- Volume: Standard shader output
RefractionBsdf
Used for materials that transmit light. Adds glossy refraction with sharp or microfacet distribution, typically for materials that transmit light. For best results, mix this with a glossy node using a fresnel factor to reduce darkness at the edges.
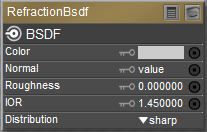
Cycles RefractionBsdf node.
Inputs:
- Color: Defines the color of the refraction.
- Normal: Connection for a normal map. If nothing is connected, the default normal shader will be used.
- Roughness: Influences sharpness of the refraction; perfectly sharp at 0.0 and smoother with higher values
- IOR: Index of refraction defining how much the ray changes direction. At 1. 0 rays pass straight through like transparent; higher values increase the amount of refraction.
- Distribution: Defines the type of microfacet distribution to use. Sharp does not use roughness values. Beckmann, GGX and Ashikhmin-Shirley use the Roughness input to soften/blur reflections.
Outputs:
- BSDF: Standard shader output.
ScatterVolume
Lets light scatter in other directions as it hits particles in the volume. Typically used to add fog to a scene, or used in combination with the Volume Absorption node to create smoke.

Cycles ScatterVolume node.
Inputs:
- Color: The color that is reflected. Unlike surface lighting nodes, this is not a color that is applied on top of the finished scattering calculation. It determines what color gets scattered and what color does not get scattered. The light that is not scattered is passed through the volume. For example, if white light passes through a volume that scatters blue, it will appear blue-ish where the light enters and scatters back, and yellow at the end where the light leaves the volume at the other end. The following figure shows more detail
- Density: The amount of light that interacts with the volume (how much is absorbed and how much passes through). Values of 0 produce no volume. Values above 0 increase the amount of volume.
- Anisotropy: Defines the direction that the light scatters. A value of 0 scatters light evenly in all directions. Negative values scatter light backwards, and positive values scatter mostly forward.
Outputs:
- Volume: Plug this output into the Volume input of the Cycles root node.
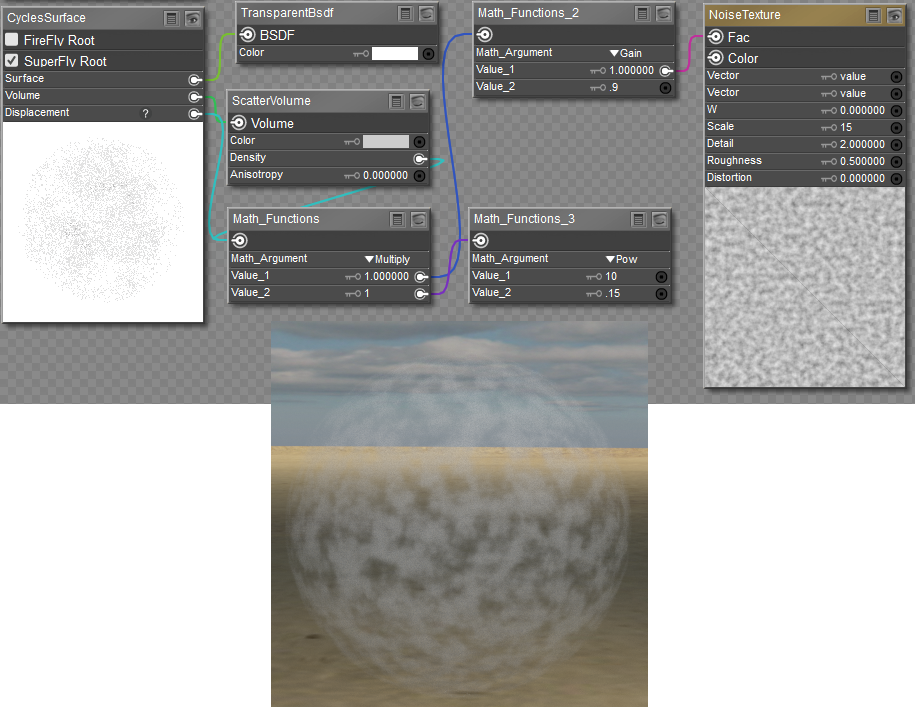
ScatterVolume can be made to render in Cycles when the Cycles Surface input connects to a TransparentBsdf node as shown below.
SubsurfaceScattering
Simple subsurface multiple scattering, for materials such as skin, wax, marble, milk and others. Light penetrates the surface and bounces around internally before getting absorbed or leaving the surface at a nearby point.
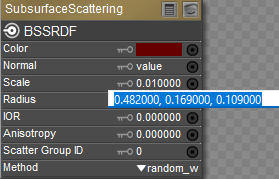
Cycles SubsurfaceScattering node.
Inputs:
- Color: Defines the base color of the surface. Example for blood red color is R 102, G 0, B 0.
- Normal: Connection for a normal map. If nothing is connected, the default normal shader will be used.
- Scale: Scale factor for the scattering radius. Default value is .01
- Radius: The maximum distance that light can scatter. The scatter radius can be configured per RGB Color channel. For skin, red colors scatter further. Three values are expected in the Radius input, representing Red, Green, and Blue scatter radius respectively (example: .482, .169, and .109 are typical values for Caucasian skin.)
- IOR: Index of Refraction for Subsurface Scattering.
- Anisotropy: Controls the directionality of subsurface scattering.
- Scatter Group ID: Can be used to prevent bleeding between two materials that have different scattering properties. For example, you might assign all skin materials to one scatter ID, and other areas like lips, eyes, or nails to other scatter group IDs.
- Method:
- Burley: Is an approximation to physically-based volume scattering.
- Random Walk: Provides the most accurate results for thin and curved objects. This comes at the cost of increased render time or noise for more dense media like skin, but also better geometry detail preservation. Random Walk uses true volumetric scattering inside the mesh, which means that it works best for closed mesh.
- Random Walk Fixed Radius: Provides accurate results for thin and curved objects. Uses true volumetric scattering inside the mesh. Works best for closed meshes. Overlapping faces and holes in the mesh can cause problems.
Outputs :
- BSSRDF: Standard shader output.
ToonBsdf
Creates Diffuse and Glossy Toon BSDF for creating cartoon light effects.
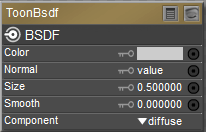
Cycles ToonBsdf node.
Inputs:
- Color: Defines the color of the surface.
- Normal: Connection for a normal map. If nothing is connected, the default normal shader will be used.
- Size: Values between 0.0 and 1.0 give angles of reflection between 0 and 90.
- Smooth: This value specifies an angle over which a smooth transition from full to no reflection happens.
- Component: Diffuse makes the material act more like a diffuse shader. Glossy produces a more reflective surface.
Outputs:
- BSDF: Standard shader output.
TranslucentBsdf
Adds Lambertian diffuse transmission to the surface.

Cycles TranslucentBsdf node.
Inputs:
- Color: Defines the color of the surface that is scattered outward.
- Normal: Connection for a normal map. If nothing is connected, the default normal shader will be used.
TransparentBsdf
Used to add transparency without refraction. Only pure white transparent shaders are completely transparent.

Cycles TransparentBsdf node.
Inputs:
- Color: Defines the amount of transparency. Black is fully opaque. White is fully transparent.
Outputs:
- BSDF: Standard shader output.
Vector Displacement
Displaces the surface of the object along arbitrary directions. Typically used to apply displacement maps created by other sculpting software because it fully represents the high resolution detail when applied to a smooth base mesh. The Displacement method must be set accordingly.
NOTE: The mesh must be subdivided sufficiently to bring out the detail in the displacement texture.

Cycles VectorDisplacement node.
Inputs:
- Vector:The vector that specifies the displacement along three axes. You can connect a texture node here. Use a baked vector displacement map. The RGB colors in an Object Space map are interpreted as XYZ Offsets. For Tangent Space maps, R offsets the tangent, G offsets the normal, and B offsets the bittangent.
- Midlevel: A neutral displacement value that causes no displacement. With the default of 0, negative values push the surface inward, and positive values push the surface outward.
- Scale: Increases or decreases the amount of displacement.
Outputs:
- Displacement: Displacement offset to connect into the Material output.
VelvetBsdf
Reflection shader for velvet cloth materials. Generally used in combination with other shaders such as a Diffuse shader.

Cycles VelvetBsdf node.
Inputs:
- Color: Defines the color of the surface.
- Normal: Connection for a normal map. If nothing is connected, the default normal shader will be used.
- Sigma: Controls the sharpness of the peak of normal distribution, somewhat like a roughness control. Increase the settings to decrease the level and size of darkness in the velvet.
Outputs:
- BSDF: Standard shader output.