Applying Post Effects to Renders
There’s often a trade-off between rendering speed and rendering quality. If you set render quality settings too low, the renders will finish more quickly, but they will contain a lot of noise. If you set your render quality settings very high, your renders will take a much longer time, but will be very sharp and clean.
There is a way to compromise. If you set your render settings in the middle range, and then use the denoising filter provided with PostFX, you can obtain very good render results in a more reasonable amount of time.
Access the PostFX settings as follows:
- To enable Post Effects in SuperFly, open the Render Settings dialog to the SuperFly tab. Check the Apply Post Effects to Render option, and then click the Open PostFX button to check the default post effects you want to apply to your render.
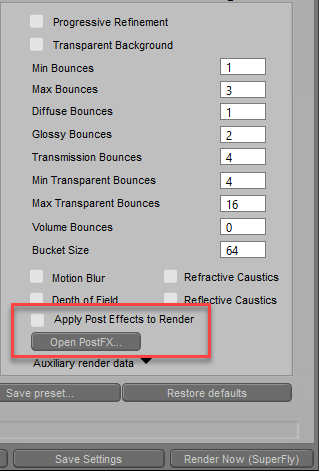
Post Effects option and button.
- A PostFX button also appears in the top center of the Render tab, as shown below. You can click this button to apply postfx to the render that is currently in the Render window (which is, by default, your most recent render). Click this button to open the Post Rendering Effects dialog.
![]()
PostFX icon.
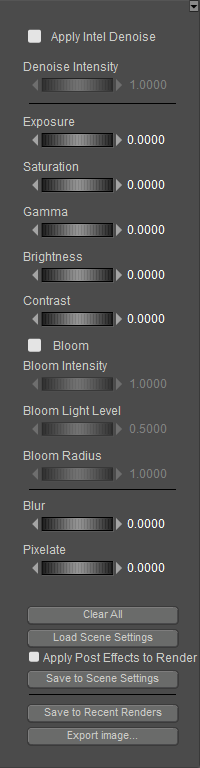
PostFX Settings
When you open the PostFX window from the Render Settings dialog, the following screen appears. This allows you to choose which post effects options and settings to use by default. The settings are described below.
The settings you apply here can be applied when you render animations using the Movie Settings window in Render Settings, or when you use the Animation > Make Movie command. For example, to render an image sequence, choose Image Files format, and then select SuperFly for the renderer.
If your images are rendered against a transparent background, export PNG format to preserve transparency. Images will be exported with an alpha channel.
Post Effects settings.
When you right-click on a thumbnail in the Recent Renders palette and choose Edit Post Effects, the Post Rendering Effects window appears. The PostFX settings (shown above) appear on the right side of the window, and a preview window appears on the left. As you make adjustments to your settings, the preview window updates to reflect them.
By default, the last render that you completed will appear in the preview. You can also click any render thumbnail in the Recent Renders palette, and click the PostFX button in the center of the options above the Render window to open the Post Rendering Effects window.
You can use this preview to view how the post rendering affects will affect your selected render. The following example shows the preview of a figure that was rendered with Medium Adaptive (GPU) render preset.
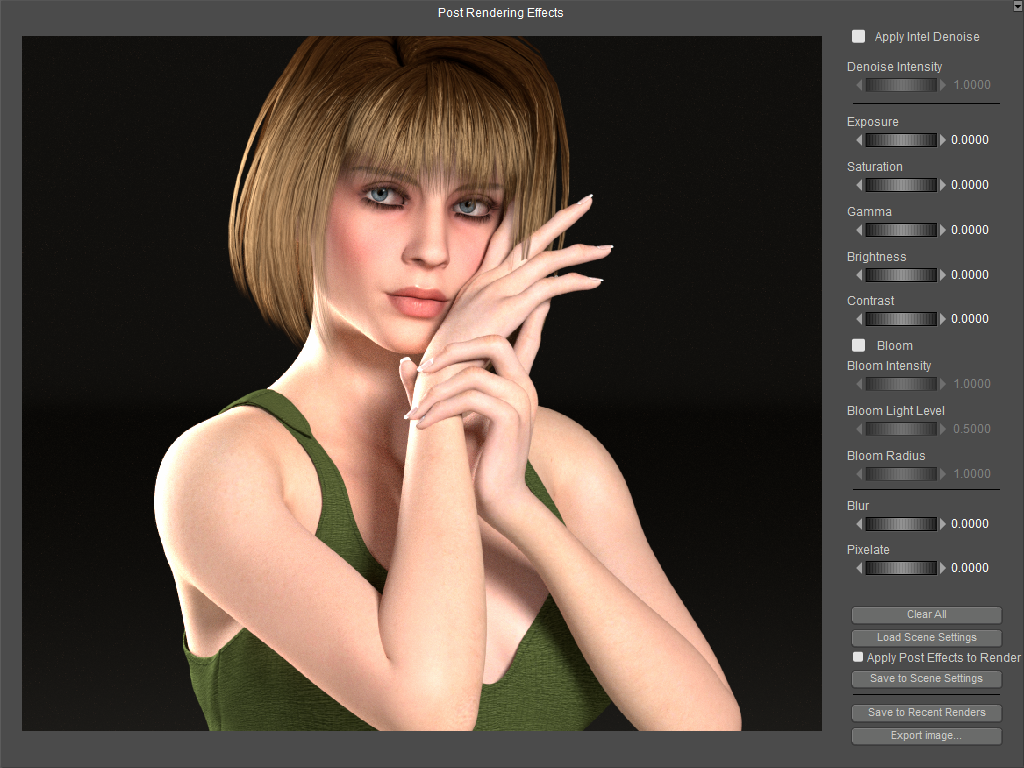
Post Rendering Effects window (denoising not applied).
Denoising
Check the Apply Intel Denoise option to apply denoising at the end of the render. Denoising generally improves the appearance of renders that are created with medium or low-quality render settings. The preview window will update with a preview of the denoised render. Use the Denoise Intensity slider to raise or lower the amount of denoising applied.

Denoised Preview.
Image Adjustments
- Exposure: Increase or decrease the Exposure slider to adjust image exposure.
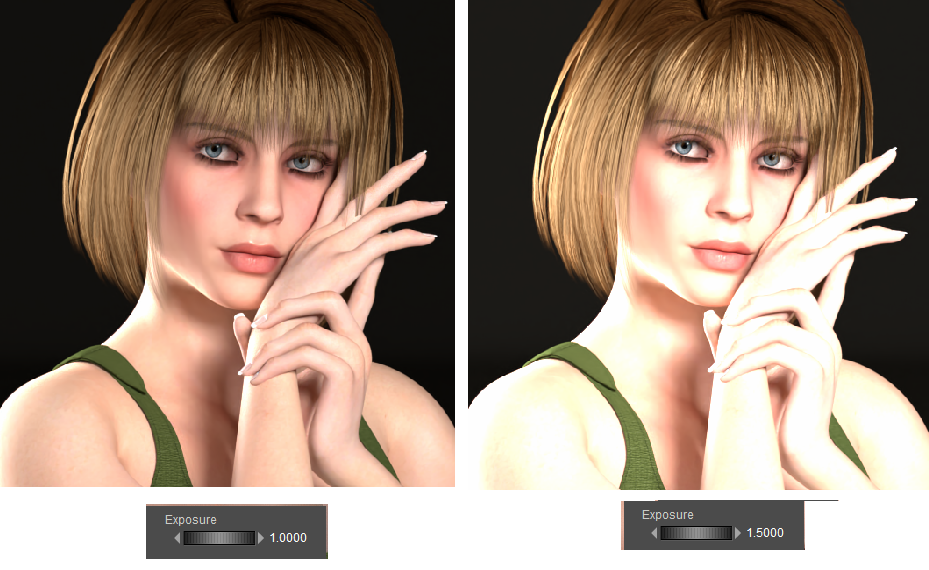
Original (left) vs Post Effects Exposure adjustment (right).
- Saturation. Use the Saturation slider to adjust the saturation of the image. Moving the slider or entering a value of -1 will generate a grayscale image.
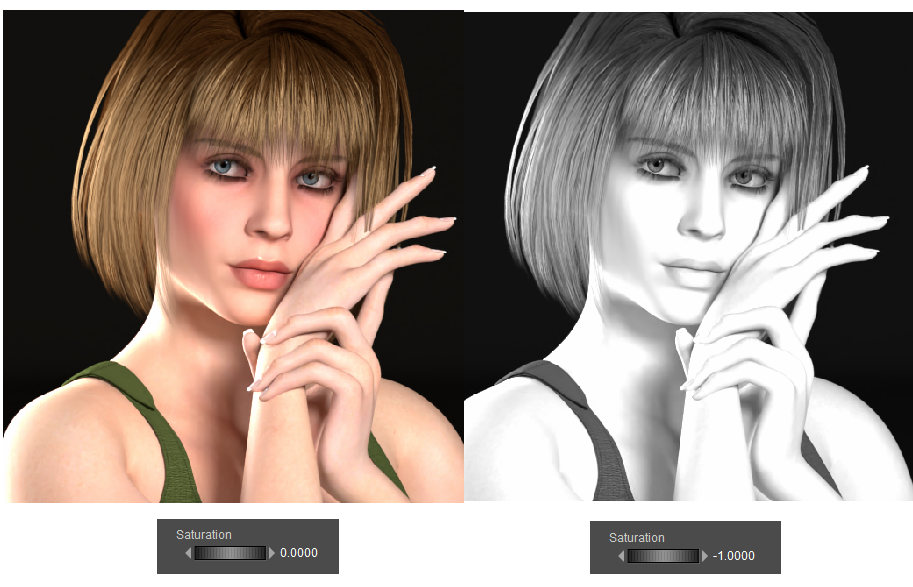
Original (left) vs Post Effects Saturation adjustment (right).
Gamma.

Original (left) vs Gamma adjustment (right).
Brightness.
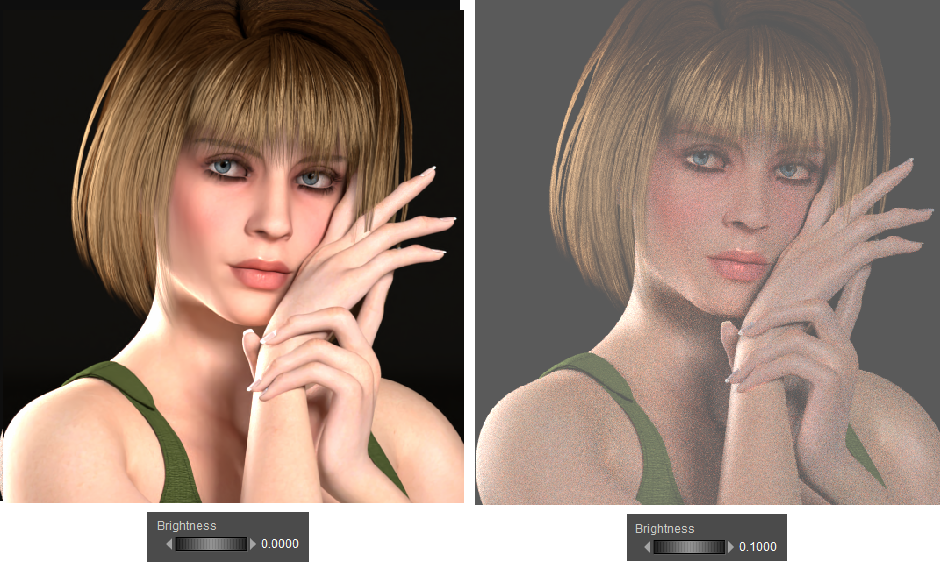
Original (left) vs Brightness adjustment (right).
Contrast:
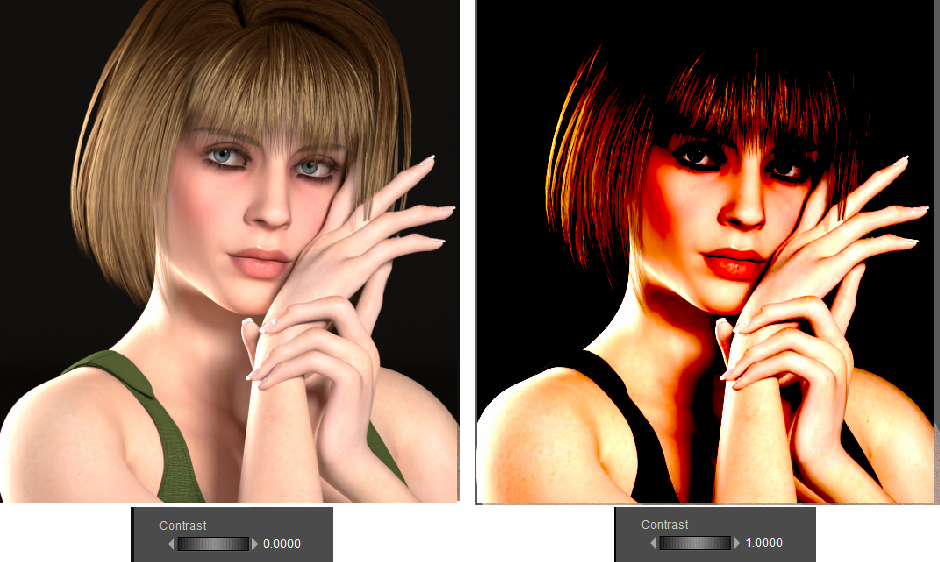
Original (left) vs Contrast adjustment (right).
Bloom
The Bloom filter makes lighting in your scene appear more realstic, by enhancing glows around lights.
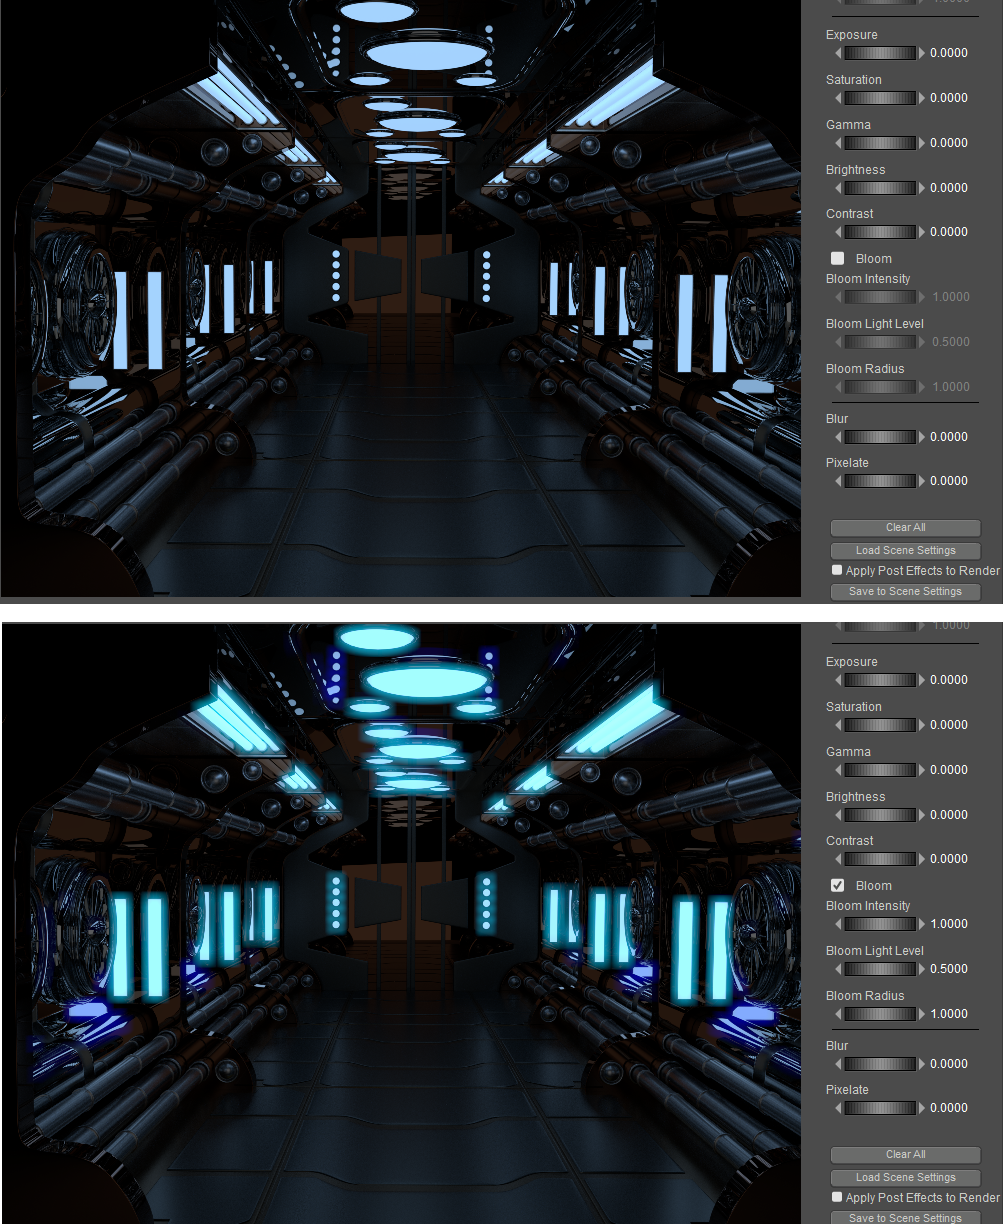
Original (top) vs Bloom enabled (bottom).
- Bloom. Check this option to enable the bloom filter.
- Bloom Intensity. Adjusts the strength of the bloom effect.
- Bloom Light Level. Adjusts how bright a area needs to be before it's included in the bloom calculation.
- Bloom Radius. Adjusts the size of the bloom effect.
Blur and Pixelate
The Blur setting blurs the rendered image by the amount specified.
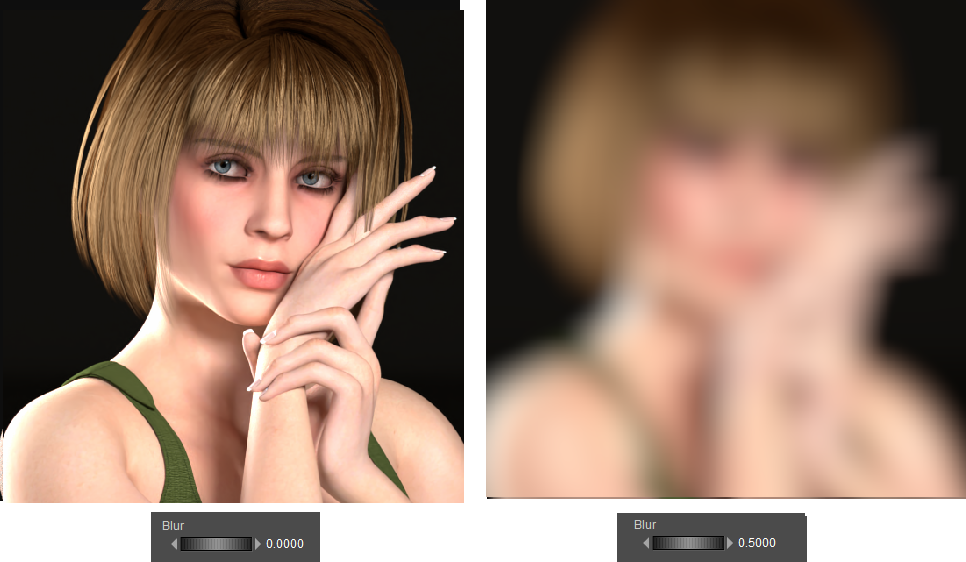
Original (left) vs Blur (right).
Pixelate
![]()
Original (left) vs Pixelate (right).
Other Post Rendering Effects Settings
- Clear All: Returns all post rendering effects settings to their default value.
- Load Scene Settings: When you restart Poser, the Post Rendering Effects window starts up with the default settings. If you open a scene that has had post effects settings saved (with the Save to Scene Settings button below) you can reset the post effects to those saved values with this button.
- Apply Post Effects to Render: Check this box to use the Post Effects settings in the Render Settings dialog.
- Save to Scene Settings: Click to apply the settings from the Post Effects window to your current scene. The post effects setting will be saved with the scene.
- Save to Recent Renders: Click this button to save the render with the post effects applied to your Recent Renders palette. From there you can export the image to any supported image format.
- Export Image: Click this button to save the image to a location on your hard drive. Poser will save the image that has post effects applied with the file name that you enter. The original rendered image (without post effects applied) will be saved as filename_Original.