Conforming Clothing
Poser includes libraries of figure-based clothing that you can use on nude figures, which are located in the Figures category of the Library palette and includes shirts, pants, shoes, dresses, skirts, etc. Conforming clothing attaches to a figure and automatically moves with the figure’s poses.
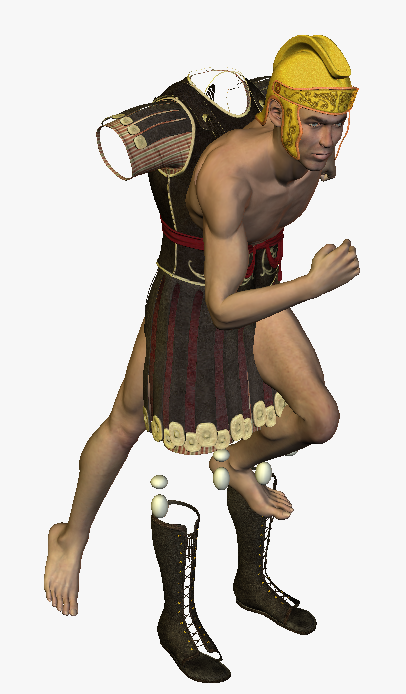
Clothing before conforming.
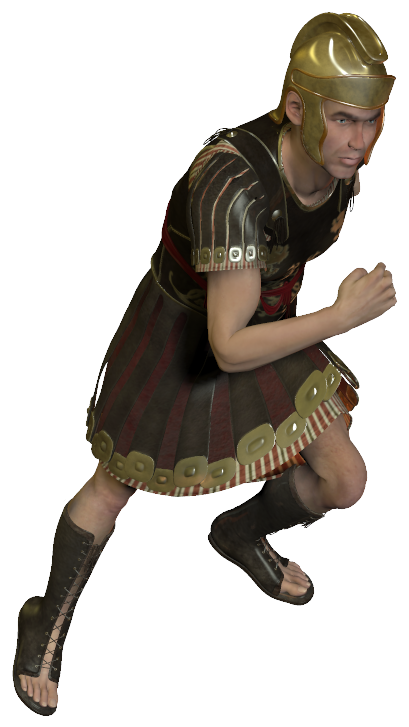
Clothing after conforming.
Adding Conforming Clothing: Automatic Conforming
The simplest way of clothing figures is with conforming clothing. Conforming clothing is poseable, just like a human or animal figure. This type of clothing is typically designed for a specific figure (for example, clothing designed for Alyson will not fit or conform exactly to the G2 figures). However, when conforming clothing is “attached” (or conformed) to the figure, it automatically bends and poses along with the character that wears the clothing.
Conforming clothing automatically “fits” to the character that it is designed for.
Options in the Properties dialog allow you to choose whether or not you want to include morphs and/or scaling when conforming your clothing to a figure. For further information, see Figure Properties.
Due to fundamental changes to Alyson 2 and Ryan 2 figures, conforming clothing created for the original Alyson and Ryan figures will not automatically conform.
Conforming clothing is rigged like a figure, including the same joint parameters. Some conforming clothing includes morphs that correspond with the morphs in the figure.
You will find conforming clothing in either the Figure library or the Props library.
- When found in the Figures library (as is typical for older clothing, or conforming clothing created by third-party content creators), conforming clothing will use a CR2 or CRZ extension.
- When found in the Props library (as is common for Poser 7 and later, and Poser Software’s G2 Figure clothing), conforming clothing will use a PP2 or PPZ extension.
You can drag and drop conforming clothing onto a selected figure and the clothing will automatically inherit the pose of the figure. To automatically conform clothing to your figure, follow these steps:
- Click to select the figure in your scene that you wish to clothe. This makes it the active figure in your scene.
- Locate a conforming clothing item in the desired Figures or Props category. Clothing is often named for the figure that it is designed to fit (for example, Alyson Pants).
- Drag the clothing from the library and drop it onto the figure that you selected in Step 1. If your figure is posed, you should see the clothing conform to the pose of the figure.
You can use Ctrl+Click or Shift+Click to select more than one piece of clothing to drag and drop. After making your selection, position the mouse over one of the selected items and then drop them as a group over the figure . Release the mouse button when the status bar at the top reads "Add and conform to (figurename)." The clothing items will load and conform to the figure one at a time.
Adding Conforming Clothing: Manual Conforming
You can use the Figure > Conform To command to manually conform clothing to any figure in your scene. The process is as follows:
- Select the figure you wish to clothe.
- Select a conforming clothing item from the desired Figures or Props category. Clothing is often named for the figure that it is designed to fit (for example, Alyson Pants).
- If your clothing is in the Figures category, click the Create New Figure button at the bottom of the Library palette. If the item is in the Props category, click the Apply Library Preset button. The clothing appears to the scene in its default position and pose. Alternatively, you can drag and drop from the Library to the Document.
- When added to the scene, conforming clothing appears in the Select Figure menu pull-down menu (described in ) Select Figure/Current Actor Menus. Verify that the clothing item that you want to conform is currently selected.
- Choose Figure > Conform To. The Conform To dialog appears, listing all of the figures in your scene. If the clothing is already conformed, it displays the name of the figure that it is conformed to.
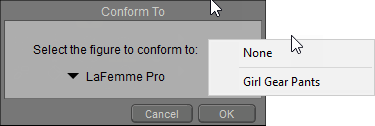
The Conform To dialog allows you to select the character that will wear the clothing.
Some tight-fitting conforming clothing may not completely cover the base figure’s skin, particularly when the figure is animated. You might notice the base figure poking through areas of the conforming clothing. There are two ways to correct this problem. The first method is to hide the body part of the figure that is poking through by setting the body part as invisible (see Body Part Actor Properties). The second method of correction is to use the Morph Brush to raise the clothing over the hole, or lower the body part underneath the clothing (see Creating Morphs with the Morphing Tool).
- Select the figure you wish to conform the clothing to in the dialog that appears. Click OK when finished. The clothing conforms to the figure.
- Apply a pose to the figure, and the conformed clothing should automatically snap to the new position.
If the clothing item that you added does not appear in the Select Figure menu, check inside the Current Actor > Props menu, because you may have added a dynamic clothing item instead. For further information on using Dynamic clothing, see The Cloth Room.
You can also use conforming clothing without a figure. Conforming clothing is treated like any other Poser figure and can be added to the Poser workspace and posed/animated just like any other Poser figure.