↵
Smoothing Geometry
Poser provides some additional features that make geometry look smoother during render time, without having to add additional geometry. The smooth shading feature affects an object’s shading without changing the geometry of its edges. Smooth shading will render creased edges between polygons as rounded, continuous surfaces rather than as hard edges. In this way, smooth shading allows you to achieve a consistently smooth shading effect, without having to alter the geometry by subdividing polygons to minimize the creases.
By default, if there are no smoothing groups specified, smooth shading will be applied to all figures and objects within a scene, according to the Crease Angle specification in the Properties palette for each given current actor. Additionally, you can customize smooth shading in one of two ways, as described in the following sections.
Geometry smoothing is affected by the following settings, as described in the sections that follow:
Crease Angle
Crease angle represents the angle between the normals of adjoining polygons. The Crease Angle property establishes a threshold up to which smooth shading will be applied. In other words, if the crease angle threshold is set to 70, smooth shading will be applied to all polygon creases with angles smaller than 70 degrees. Polygon creases with angles greater than 70 degrees will not be smoothed.
You can specify the Crease Angle threshold in the Properties palette for each individual actor within a figure or object. By default, Crease Angle is set to 80 degrees for all actors.
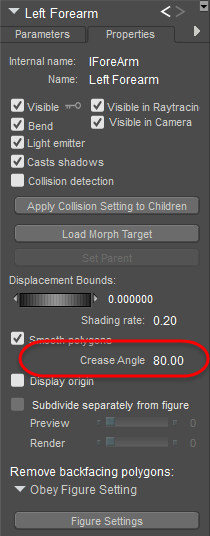
You can set crease angles for an element in the Properties dialog.
To change the crease angle globally, select Edit > General Preferences, and click on the Document tab.
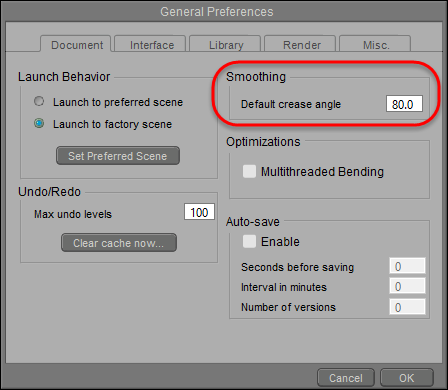
Global scene crease angles can be set in the General Preferences dialog.
The following images provide examples of a sphere with crease angles set at 10 degrees and 80 degrees, respectively.
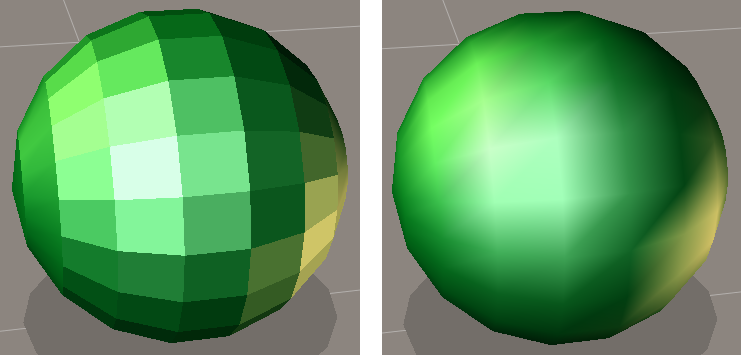
Different crease angle settings: 10 degrees (left) and 80 degrees (right).
Smoothing Groups
You can use the Group Editor palette to establish smoothing groups, which define the specific polygons to which smooth shading should be applied. This approach is useful in that it allows you to customize smooth shading at the polygon level, and gives you the ability to have hard edges intermixed with smooth creases. Smoothing group settings will override the crease angle setting for those specific polygons.
Select the Grouping tool from the Editing Tools palette, which will bring up the Group Editor palette. You can either assign all polygons in one or more of your figure’s existing object groups to smoothing groups, or you can create specific new smoothing groups, which will enable you to customize smooth shading at the polygon level. Please refer to The Group Editor for more information about creating new groups.
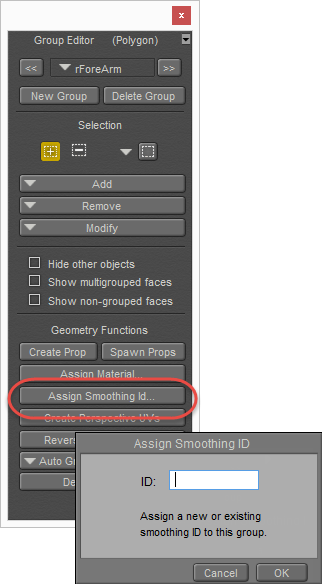
Assign Smoothing IDs in the Group Editor.
Once you have your groups established, simply click on the Assign Smoothing ID button to designate the currently selected group as a smoothing group. At render time, polygon creases between all adjoining polygons within the same smoothing group will be smoothed. Polygon creases between adjoining polygons in different smoothing groups will not be smoothed, and will therefore be rendered as hard edges. Thus you should take care as to which Smoothing ID you assign to each specific polygon group.
Different polygon groups can be assigned the same Smoothing ID, which will ensure smooth shading across the geometric breaks between groups. To do this, simply create a smoothing ID for the initial group, and then select that same ID from the pop-up list when assigning Smoothing ID’s to the other groups.
Poser will recognize and support existing smoothing groups in imported geometry. Thus, if you import figures or objects from another 3D application, Poser will apply smooth shading according to the imported smoothing group definitions, in the same manner as if the smoothing groups had been assigned within Poser.
Smooth Polygons
In the render settings, smooth polygons activates polygon subdivision to smooth hard edges at render time. If your image contains visible rough edges because your polygon mesh is sparse, then the render time polygon smoothing can render those edges smooth. See FireFly Options Settings for more information about applying this option.
Smooth Polygons is not supported in SuperFly.
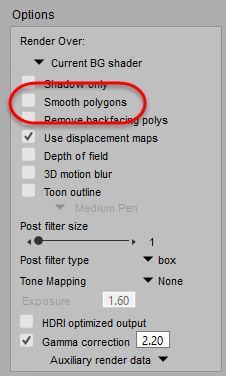
Enable or disable Smooth Polygons settings in the Render Settings dialog.
Note that the render time polygon smoothing will not override hard edges specified by either the crease angle or smoothing groups. Thus, you can specify hard edges definitively using either of those methods, and still apply render time polygon smoothing to all other edges.
The following figure illustrates the render time polygon smoothing effect. On the left is a sphere with a crease angle set to 80 degrees, with no polygon smoothing. On the right is the same sphere with polygon smoothing enabled.
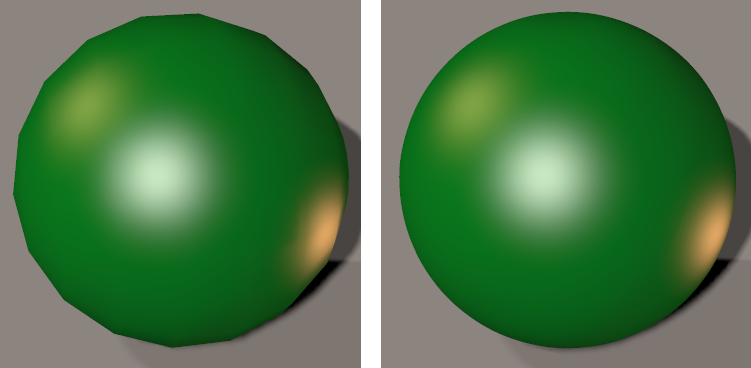
Spheres shown without (left) and with (right) polygon smoothing.