Step 3: Cloth Groups
Objects being converted to cloth must have single-sided, connected (welded) polygons without caps. Once you’ve created a cloth simulator and cloth object, the next step is to create cloth groups (groups of vertices) within each object, thus subdividing the cloth object into regions (in the same manner as, for example, dividing a body part into different material groups). The exception is decorative objects such as buttons, belt buckles, etc., which should be separate (non-welded) objects. Cloth groups use vertices instead of polygons, meaning that the Group Editor palette operates in vertex mode in the Cloth room (as opposed to polygons). You can convert polygon groups to vertex groups in the Cloth room by clicking the Add Group button to open a pop-up list of existing groups. Group names with the suffix [P] are polygon groups. Selecting polygon groups includes all vertices of the affected polygons.

Cloth Group objects.
There are four types of groups available for cloth objects:
- Dynamic: By default, cloth objects are created with one dynamic group (_default_) comprising the entire object. Dynamic cloth groups are simulated using the Dynamics Controls (see following step), which determine how the cloth moves, folds or drapes as it responds to gravity, wind force and how an underlying figure/prop moves. Examples of moving figures and props include a ball underneath a carpet, or a figure underneath clothing. You can create multiple dynamic groups for each clothing object, and each dynamic group can have different dynamics settings. You cannot directly animate dynamic groups with regular keyframing.
- Choreographed: Each cloth object can have one choreographed group. An empty choreographed group is automatically created when you clothify an object. Choreographed vertices can follow keyframed movement or be excluded from the cloth simulation.
- Constrained: Each cloth object can have one constrained group. An empty constrained group is automatically created when you clothify an object. Constrained vertices “stick” to corresponding polygon faces of the underlying figure and are useful for cloth areas that have to follow the movement of the underlying body part. They can be used to prevent straps on a dress from slipping down the shoulders, or to create a skirt’s belt that follows the waist’s movements. If you do not place these vertices in a constrained group, gravity can cause the cloth to fall until the skirt hits the body or the ground. Constraining the belt vertices keeps the belt at the waist and reduces simulation time. If the belt contains complex geometry, the simulation will slow down.
- Decorations: Each cloth object can have two decorations groups (one “soft” and one “rigid”. These groups are automatically created with empty contents when you clothify an object. The decoration groups animate, moving as underlying cloth moves while staying over the underlying body. Good candidates for decoration vertices include tiny or thin polygons such as pockets, belt loops, buttons, a knot in a tie, etc. These are usually items sitting on another cloth group and have only passive movement, either following underlying body movement or other parts of the cloth. Because of their small size and/or irregularity, these can cause issues if not placed into this group. The decorations group favors accessories that are geometrically separated from the cloth mesh object. There are two reasons for this:
- If the decorations group shares vertices with the cloth mesh, the decorations vertices will not be simulated. This causes the simulator to treat these areas as boundaries, resulting in increased movement of these areas compared to neighboring regions of the cloth.
- Welding accessories to the cloth mesh often creates a complex mesh where one edge is shared by more than two polygons.
The two types of decoration groups are:
- Soft: Objects in the soft decorated group move with the underlying cloth and can flex as the cloth flexes. A good example would be a belt loop.
- Rigid: Objects in the rigid decorated group move with the underlying cloth but do not bend or flex. Good examples of rigid decoration objects are buttons or the knot in a tie.
If you want the current cloth object to consist of a single dynamic group, you’re done. Continue on to Step 4 (below) to set your dynamics. If, however, you want to create multiple groups, you can do so using the following buttons:
- New Dynamic Group: Clicking the New Dynamic Group button opens the New Dynamic Vertex Group Name box. Enter your desired name for the new dynamic group and click OK to proceed or Cancel to abort. By default, your entire cloth object consists of a dynamic group called _default_. Any vertices that are not part of other dynamic, constrained, choreographed, or decorated groups when you’re done creating/editing groups will remain in the _default_ group.
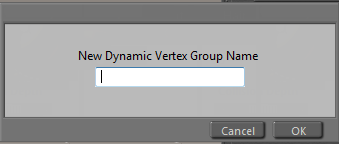
Assigning a name to a Dynamic Group.
Since each cloth object can only have one choreographed, constrained, and/or one each soft & hard decorated groups, you can only assign names to dynamic groups.
- Delete Dynamic Group: Clicking the Delete Dynamic Group button deletes the currently selected dynamic group.
- Edit Dynamic Group: Clicking the Edit Dynamic Group button opens the Group Editor palette, which allows you to add or remove vertices from the currently selected group. Please refer to Creating/Editing Groups for information on using the Group Editor palette.
- Edit Choreographed Group: Clicking the Edit Choreographed Group button opens the Group Editor palette, which allows you to add or remove vertices from the currently selected choreographed group (_choreographed_). Please refer to Creating/Editing Groups for information on using the Group Editor palette.
- Edit Constrained Group: Clicking the Edit Constrained Group button opens the Group Editor palette, which allows you to add or remove vertices from the currently selected constrained group (_constrained_). Please refer to Creating/Editing Groups for information on using the Group Editor palette.
- Edit Soft Decorative Group: Clicking the Edit Soft Decorative Group button opens the Group Editor palette, which allows you to add or remove vertices from the currently selected soft decoration group (_softDecorated_). Please refer to Creating/Editing Groups for information on using the Group Editor palette.
- Edit Rigid Decorative Group: Clicking the Edit Rigid Decorative Group button opens the Group Editor palette, which allows you to add or remove vertices from the currently selected rigid decoration group (_rigidDecorated_). Please refer to Creating/Editing Groups for information on using the Group Editor palette.
Keep the following in mind when working with cloth groups:
- Adding vertices to the current group removes them from other groups.
- Removing vertices from the default group adds them to the choreographed group.
- Removing vertices from any group adds them to the default group.
The arrow at the top right of the Cloth area displays the currently selected cloth group within the currently selected cloth object. Clicking this arrow opens a pull-down menu allowing you to select any of the cloth groups in the current cloth object for modification. To work on a different cloth object, use the pull-down menu available in the Cloth area (Step 2).