Using Layer-Only Materials
Layer materials are a special type of material that adds a layer to an existing base material. Essentially, a layer-only material is a partial material file that does not have a base layer. Unlike a conventional material they never replace the material that's already loaded. A Layer material always adds another layer. This makes this type of material ideal for use as a add-on to other materials. They can be used to add makeup, dirt, scars, tattoos and other details to an existing material.
Layer materials can contain multiple materials in a single file the same way a Material Collection contains multiple materials. The material layer is meant to be used in conjunction with a base material but the base material is saved as a Material Collection (MC6 extension for uncompressed, and MCZ extension for compressed).
Layer-only materials will be saved to the library with a new file extension and file type icon to differentiate from a regular material collection. The MLC extension will be used for uncompressed Layer-Only materials, and the MLZ extension will be used for compressed Layer-Only materials.
Material layers only work with the SuperFly render engine. When rendered using FireFly they simply won't render.
- Applying the first layer-only material to a base layer will add a layer above the base.
- Applying another layer-only material will not replace an existing one. A new layer-only material layer will be added to the existing layers.
Layer-Only materials will also work in Poser 12, build 1029.
Creating Layer-Only Materials
To create a Layer-Only material, follow these steps:
- Open the Material Editor in Edit view and select the material to which you want to add a layer.
- Click the Material Layers button at the top of the editor window. The Material Layers window opens. The Base layer, and any other existing material layers will be shown in the list.
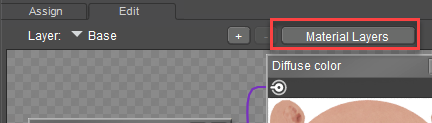
Material Layers button.

Material Layers window.
- Click the + (plus) button to add a new material layer. The layer will be placed above any existing base or material layers, similar to image layers in Photoshop. By default, the layer will be named Layer_x, with x being the next available layer number.
- Click the Rename button to enter a more descriptive name for the material layer.
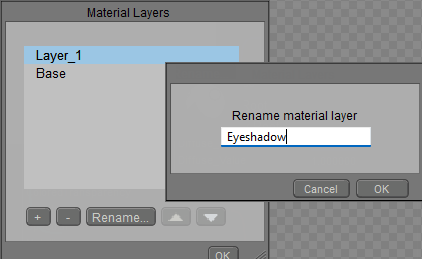
Renaming a material layer.
The Material Layer Editor allows you to manage layers in a material. The [+} and [-] buttons allow for adding and removing material layers. The Rename button brings up a dialog to enter a name for the selected layer. The up and down arrows move the selected layer up and down the layers.
Building the Layer-Only Layer
Use the Edit view in the Material window to build your material layer. Keep in mind that material layers work in SuperFly only, so you may prefer to use the Physical Surface root, or the Cycles Surface root with the Principled BSDF node.
In this simple example, the Physical Surface root is added for SuperFly materials.
- The Color channel is used to define the eye shadow color.
- A mask that designates the eye shadow area is attached to the Transparency input, which is set to 1.
- A Cycles > Color > Invert node is used to invert the eyeshadow mask for the Roughness input. The darker areas will appear more glossy, and the white areas will allow the roughness from the base area to remain unaffected. The Roughness is set to .5 in the Physical Surface node.
- A 3D Textures > Spots node is used to simulate metallic flakes. A Color Math node multiplies the spots with the eyeshadow mask to only apply the spots to the eyeshadow. Then it connects to the Metallic input of the Physical Surface node, with the value set to 1.
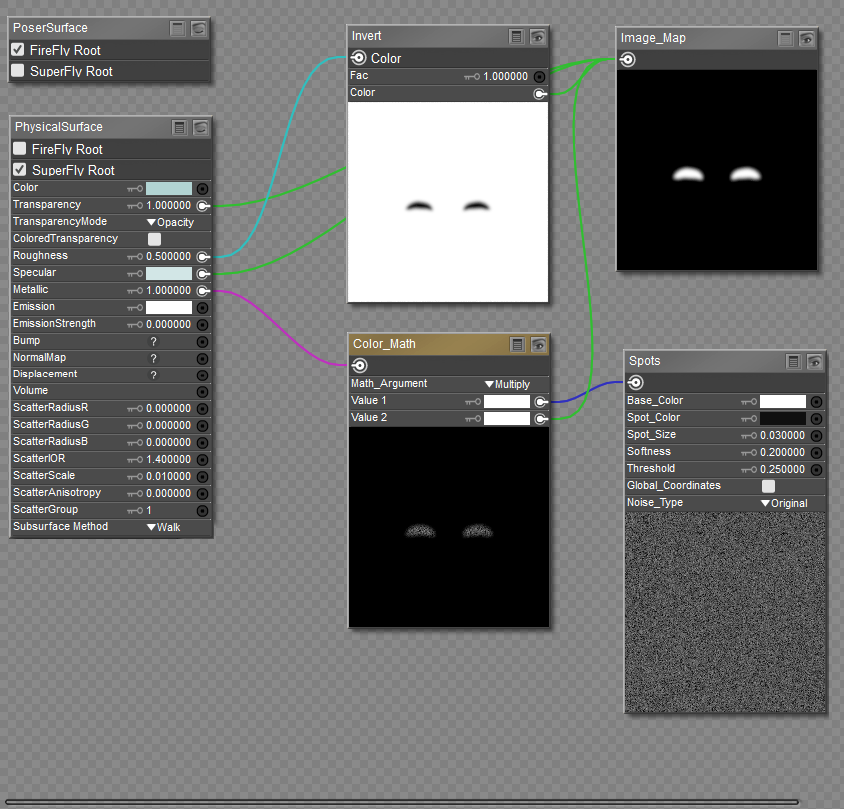
Building a material layer.
Managing Material Layers
The Material Layers window also allows you to manage material layers as follows:
- Use the - (minus) button to delete the selected material layer.
- Use the up arrow to move the selected layer toward the top of the layer stack.
- Use the down arrow to move the selected layer toward the bottom of the layer stack. Layers cannot be moved below the base layer.
Saving Layer-Only Materials
To save your material layer to the library, follow these steps:
- Select the figure or object that contains the materials that have layers you intend to save to the library.
- Select the Materials category from the Poser Library.
- Create or navigate to the folder that you want to use for your materials and material layers.
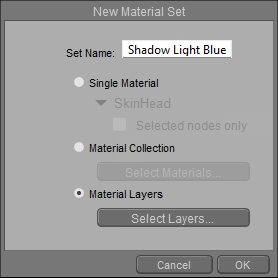
- At the bottom of the library click the (+) button to add a library item. The New Material Set window appears.
- Name the material layer appropriately. In this case, the name is set to Eye Shadow Light Blue.
- Select the Material Layers radio button at the bottom of the New Material Set dialog. This option will be grayed out if the selected object has no materials.
- By default, all of the layers in all materials of the selected object will be saved. To choose specific materials or layers, click the Select Layers button. Then check the options you want to include, and uncheck the options you want to exclude. Click OK to confirm the layer selections.
- When you return to the New Material Set window, click OK to save the material layer to the library.
Saving a material layer.