Prefit
When you run a fitting simulation, the areas that you include in the Prefit method will be pulled inward or outward before the other fitting methods are calculated.
When you initially create a fitting simulation, it initially opens with the Tighten method controls displayed. A good way to determine areas where prefit might be required is to click the Fit button before you assign areas to prefit. Often you can add Prefit to the areas where the figure pokes through the clothing.
If there are areas in your clothing model that are separated from the main body (such as cuffs, pockets, collars, buttons, and such) it might be beneficial to perform the Prefit after you assign these items to others methods.

Adding the Prefit method to areas that do not fit properly after clicking the Fit button.
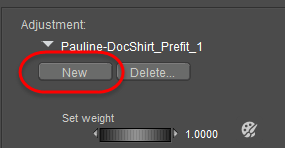
In order to use the Prefit method, you will need to create a Prefit Adjustment. To do so, click the New button in the Adjustment section. A new adjustment will be created and automatically named for you.

Click the New button to create a Prefit Adjustment.
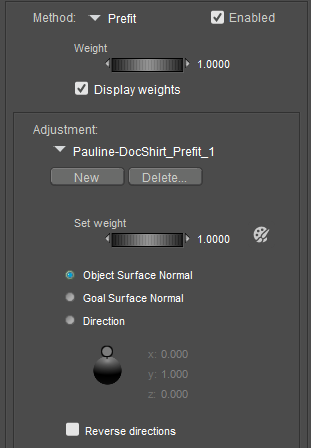
After you create the Prefit adjustment, the following controls appear in the Fitting Sessions palette for the Prefit method:

Prefit options.
- Delete: Click this button to delete the currently selected Prefit adjustment.
- Set Weight: Controls the weight at which the current Prefit adjustment will be applied to the clothing. A setting of 1 applies the method at its full strength.
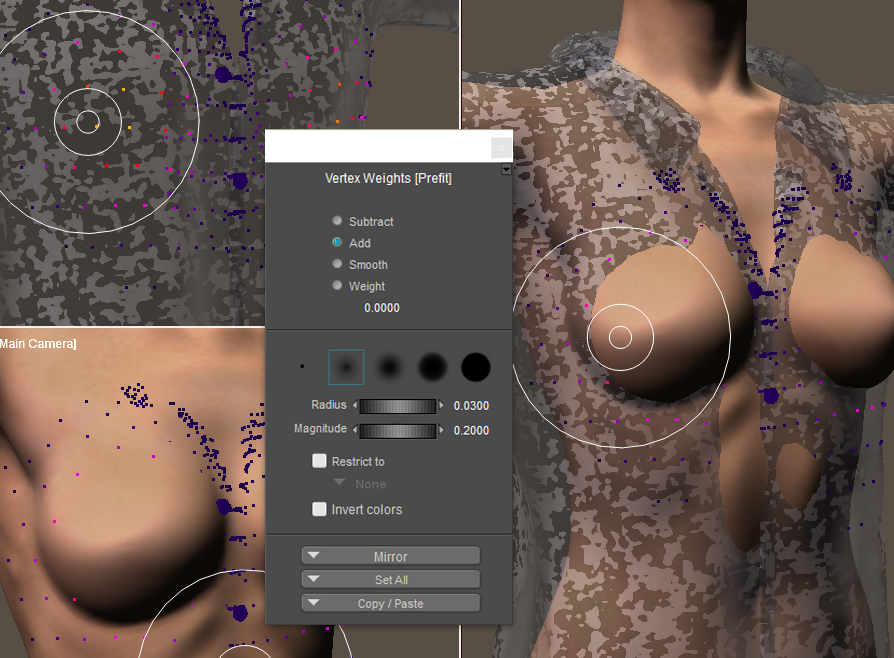
- Paintbrush: Click the Paintbrush icon to enable the vertex painting tools.
- Object Surface Normal: Moves the clothing vertices that you add to the Prefit method inward or outward based on the direction of the normals in the clothing item.
- Goal Surface Normal: Moves the clothing vertices that you add to the Prefit method inward or outward based on the direction of the normals of the character that you are trying to fit.
- Direction indicator: Moves the clothing vertices that you add to the Prefit method inward or outward in a specific direction. Drag the circular indicator around the globe to specify the direction of the prefit.
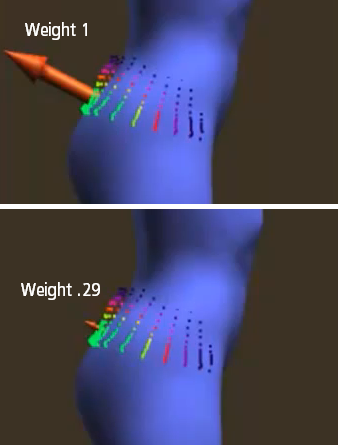
The Weight setting in the Prefit method controls the amount that the clothing will be moved during the Prefit method. The Direction indicator gives you a visual indication of this setting as you adjust the Weight setting. Adjust the Weight setting until the Direction indicator displays the amount at which you want the clothing to move in that direction.

The Weight setting will resize the direction indicator to display how much the Prefit method will move the clothing.
- Reverse directions: By default, the Prefit method will pull clothing vertices away from the character during the Prefit calculations. Check Reverse Directions to pull clothing vertices toward the character instead.