FireFly Options Settings
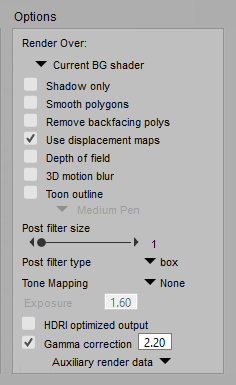
Firefly Options.
- Render Over: These options specify the background to be used when rendering images or movies. Check the appropriate radio button for the option you wish to select.
- Background Color: Selecting Background Color renders the image/movie over the Document’s background color. Please refer to Colors for information about changing Document colors.
- Black: Selecting Black renders the image/movie over a plain black background.
- Background Picture: Selecting Background Picture renders the image/movie over the background image in your scene. Please refer to Using Background Pictures for information on importing background pictures.
- Current Background Shader: Selecting Current BG Shader renders the image/movie over the specified background shader. Please refer to Root Background Node for information about using background shaders.
- Shadow Only: Checking the Shadow Only checkbox will cause only the shadows from your scene to be rendered; everything else in the scene will be completely white. This feature is most useful for production rendering, as it allows you to render just the shadows, thereby allowing you to edit them independently from the rest of the scene. You can then take the shadow only render into an image editing program, and composite it with the unshadowed scene. This setting overrides all other render settings.
- Smooth Polygons: Checking the Smooth Polygons checkbox enables polygon smoothing, and vice versa. When enabled, the FireFly rendering engine uses polygon subdivision to smooth hard corners on objects. If your scene contains hard edges that you don’t wish to have smoothed, you should define those hard edges either by specifying smoothing groups or by setting a crease angle threshold to determine which polygons are affected. Please see Smoothing Geometry for more information about smoothing groups and setting the crease angle threshold. This option can be disabled for specific objects as needed, in the object’s Properties palette.
Smooth Polygons is not supported in SuperFly.
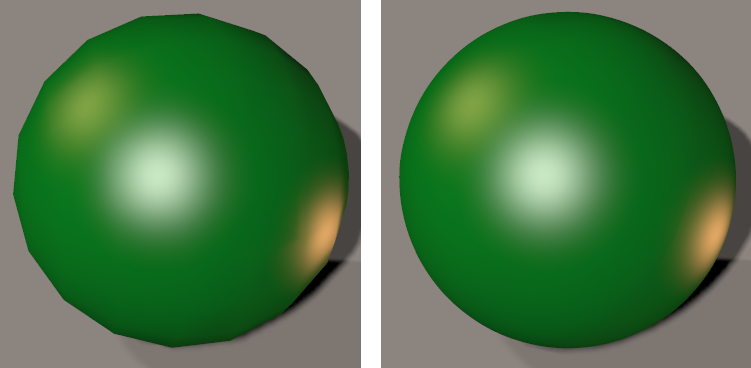
Without Polygon Smoothing (left); With Polygon Smoothing (right).
- Remove Backfacing Polys: Check the Remove Backfacing Polys option to turn off rendering of all polygons that do not face the camera. This option saves rendering time, but can effect realism when using raytracing. The polygons that are rendered depend upon the angle and position of the camera and objects in your scene.
- Use Displacement Maps: Checking the Use Displacement Maps checkbox enables (checked) or disables (cleared) using displacement maps in your rendered output. Please see The Material Room for information about the Material room.
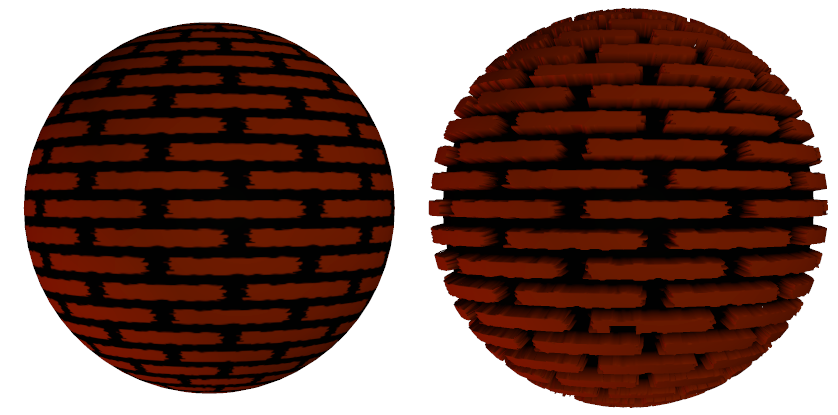
Without Displacement (left); With Displacement (right).
- Depth of Field: Widening the lens aperture of the camera allows you to achieve a Depth of Field effect. The farther away items are from the focal plane, the more blurred they will appear. The Depth of Field checkbox allows you to enable or disable this effect when rendering your scene. Please refer to Camera Parameters for information on configuring Depth of Field settings.
- 3D Motion Blur: Checking the 3D motion blur checkbox enables motion blurring for your scene when rendering. When this option is enabled, adjusting the shutter open and close times affects the amount of blurring. Please refer to Motion Blur Document for more information about using this feature.
- Toon Outline: The Toon Outline option uses post-processing during the rendering process to draw an outline around the edges of cartoon images. You can select from nine outline brush styles. We recommend applying a Toon shader node to your images, and then complementing that shading with the Toon Outline option. Check the Toon Outline checkbox to enable this feature.
Toon outlines are not supported in SuperFly.

Toon Outline.
- Post Filter Size: The post filter supersamples pixels, that is, samples the colors at various points inside a pixel to arrive at the final pixel color. This is done in order to reduce or eliminate various forms of aliasing (jagged edges) that can occur under different circumstances. The final pixel color is a weighted average of the supersample. Increasing this value increases the area used for supersampling, but affects rendering time and resources. You can adjust this value by moving the Post Filter Size slider or by clicking the dots on either slide of the slider to increment (right) or decrement (left) the value.
- Post Filter Type: A post filter operates on an image and modifies its appearance by applying a specific weighting algorithm to the supersamples taken for each pixel. The specific algorithm used for determining relative sample weights depends upon which filter you select using the Post filter type pull-down menu. Your options are as follows:
- Box: A Box filter gives equal weight to all samples within a sampling region with a diameter equal to the pixel filter size.
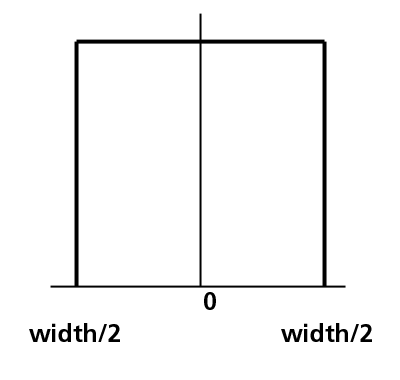
Box filtering example.
- Gaussian: A Gaussian filter gives a variably decreasing amount of weight to all samples within a radius equal to half the pixel filter size, with the maximum reduction in weight occurring farthest from the center of the sampling region.
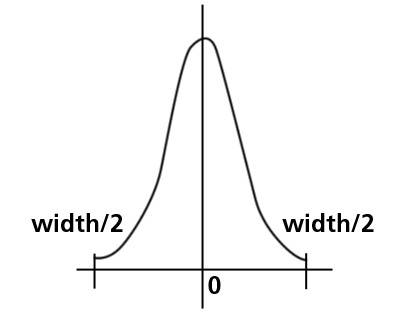
Gaussian filtering example.
- Sinc: A Sinc filter uses a decreasing sine wave calculation to assign weight to samples within a radius roughly half the pixel filter size. The sine wave effect is similar to ripples radiating from the center point, where samples will be given weight according to their relative positions with regards to the “crests” and “troughs” of the ripples.
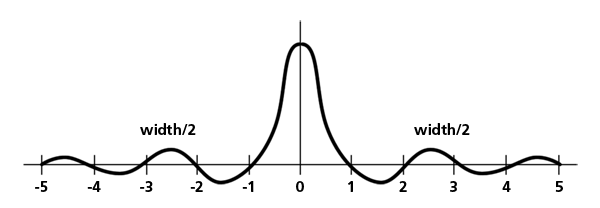
Sinc filtering example.
- Tone Mapping: This feature is useful for scenes with a high dynamic range. Tone Mapping provides more control for brightness, saturation, and post-render processing to produce better images. It helps control overly bright areas in an image to produce better, less blown out final renderings with deeper contrast, helping to bring the brightest areas back into a reproducible range. It helps preserve as much information from a high dynamic range source as possible in an LDR image or display. Two modes of tone mapping are available.
- Exponential: Works like film. The more you expose film, the less sensitive it gets. This is a post rendering filter that uses an exponential curve to gently approach white. The brighter it gets, the less sensitive gets.
- HSV (Hue, Saturation, Value) exponential: Treats V exponentially, none on H, S. Brightness doesn’t desaturate or overbrighten color. It not physically accurate, but may be easier to control in scenes where you want to get brights into a normal range without going to white. .
- Exposure: Editable when either Exponential or HSV Tone Mapping are selected. This setting is the exponent used in Exponential calculations.
- HDRI optimized output: Check this option to generate an image that is HDRI compatible. For further information, see High Dynamic Range Image (HDRI) Export.
- Gamma Correction: See Gamma Correction and Linear Rendering for more information.
- Auxiliary Render Data: Allows you to choose properties for output to individual PSD layers. For further information, see Rendering Layered PSD Files.
Once you have finished entering your desired settings, click OK to store them. Render settings are saved when you save your scene. Clicking Cancel closes the Render Settings dialog without storing your changes.
To render your scene as a still image, select Render > Render or click the Render Now button in the Render Settings dialog.
To render animations, please refer to Rendering Animations for more information.