Kitty1 Textures-Principled
The Cycles Principled BSDF node is introduced in Poser 12. It is a PBR "uber" shader that works in Poser 12 and later Cycles only. You can connect PBR textures to the Principled Surface node and then use the additional properties in the node to further enhance the textures with additional settings available in the Principled BSDF node.
The one drawback of Cycles materials in Poser is that they preview in gray and you don't see the results until after you render. As a result, you will probably need to test your materials with area renders as you design them, and then when posing your scene you might want to preview the results in FireFly and then switch to SuperFly for the final renders.
This latter point is why the sensible approach is to use the Cycles/Principled BSDF nodes in conjunction with shaders that already work with FireFly. To that end, if you have followed the tutorials starting with Using PBR Maps with Poser, you already have shaders that you can start with. If you haven't completed the tutorials, there is a material preset that will apply these materials for you to start with.
Adding the Cycles Root and Principled BSDF Nodes
To add the Cycles and Principled BSDF nodes to the Kitty1 Textures, follow these steps:
- Create a new scene in Poser. Delete the default La Femme figure.
- Navigate to the Figures > Included > Toys character library and add SA Kitty Mass Production to your scene.
- Adjust the camera so that you can view the character more closely.
- From the Materials library, navigate to the Materials > Included > Toys > SAKitty Tutorial library. Click the single checkmark to apply the SAKitty-Physical material to the kitty. This is the completed version of the tutorials relating to the Physical Root node.
- Switch to the Edit view in the Material Room. Select the BodyColor1 material.
- Collapse the physical surface node so that it's minimized as much as possible. This will give you room to add the Cycles Surface and Principled BSDF nodes.
- Right-click in empty space and choose New Node > Root > Cycles Surface. Check the SuperFly Root box in the node.
- Right-click in empty space and choose New Node > Cycles > Shader > PrincipledBsdf.
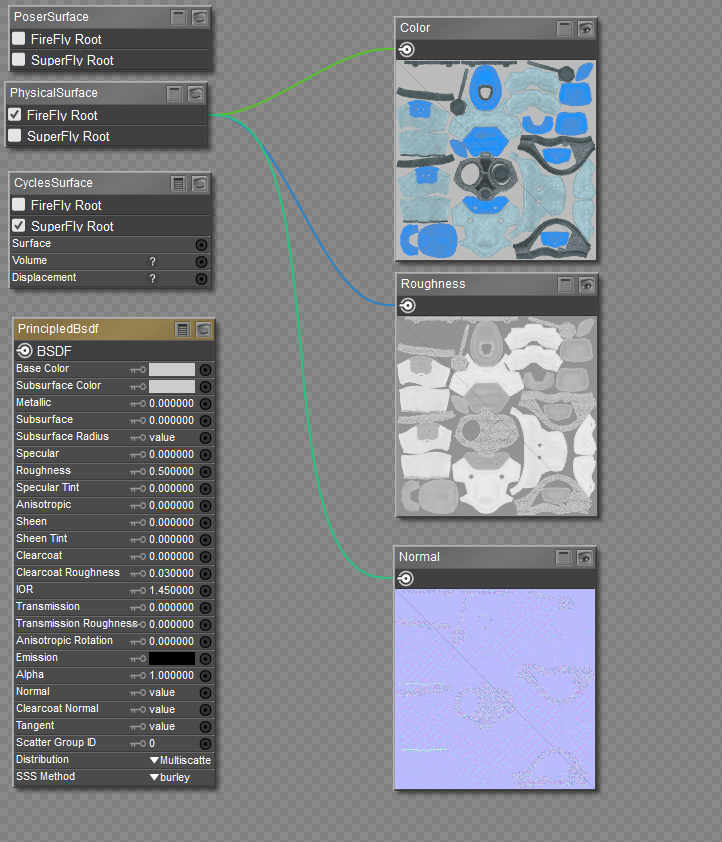
Add the Cycles Surface and Principled BSDF nodes.
A reminder that the SAKitty1 maps are applied to the following materials:
- BodyColor1: Hexagon Pattern
- BodyColor2: Soft Denim
- BodyColor3: Matte Plastic
Connecting the Nodes
Connect the nodes together as follows:
- Connect the BSDF output of the PrincipledBsdf node to the Surface input of the CyclesSurface node.
- Set the Base Color chip of the PrincipledBsdf node to pure white.
- Connect the output of the Color map to the Base Color input of the PrincipledBsdf node.
- Changing the Specular value in the PrincipledBSDF node to .5 is recommended for textures that are created by Substance Painter. This will
- Connect the output of the Roughness map to the Roughness input on the PrincipledBsdf node.
- For the normal map:
- Right-click in an empty area and choose New Node > Cycles > Vector > NormalMap to add a Normal Map node to the workspace.
- Connect the output of the Normal texture map to the Color input of the NormalMap node.
- Set the Space type in the NormalMap node to Tangent.
- Connect the Normal output of the NormalMap node to the Normal input of the PrincipledBsdf Node.
- Right-click in an empty space in the Edit workspace, and choose Select All to select all the nodes. Then right-click and choose Copy to copy them to your clipboard.
- Replace the BodyColor2 and BodyColor3 materials with the udpated materials in your clipboard. (Select All, then Replace).
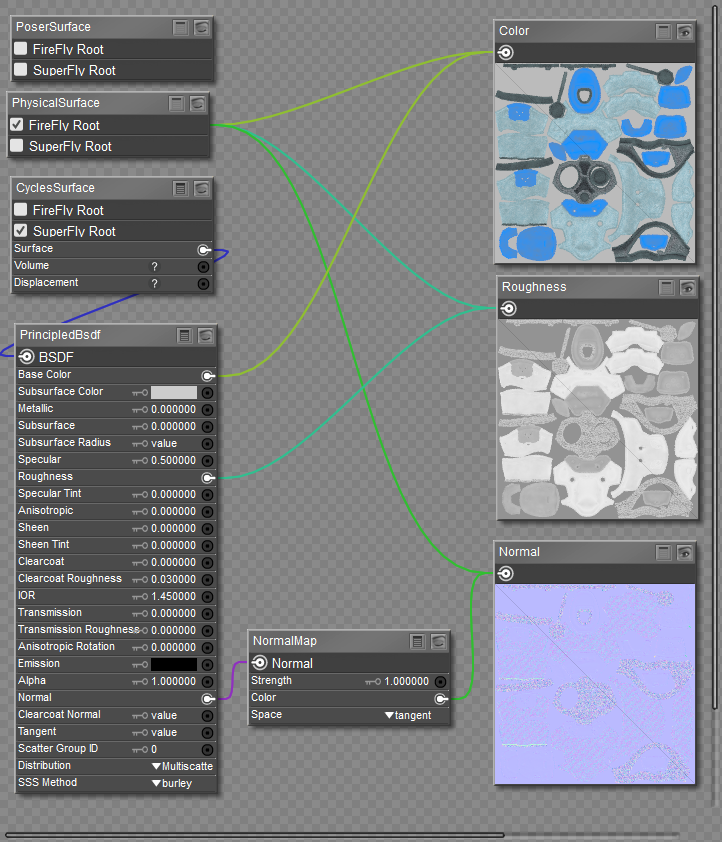
Kitty1 maps connected to Cycles/Principled BSDF node.
Attaching Bump Maps to the Principled BSDF Node
If you are using a Bump map instead of a Normal map, connect the Bump map as follows:
- Right-click in an empty area and choose New Node > Cycles > Vector > Bump.
- Connect the output of the Bump image map node into the Height input of the Bump node.
- Connect the Normal output of the Bump node into the Normal input of the PrincipledBsdf Node.
- Set the Bump map strength using the Strength value in the Bump node.
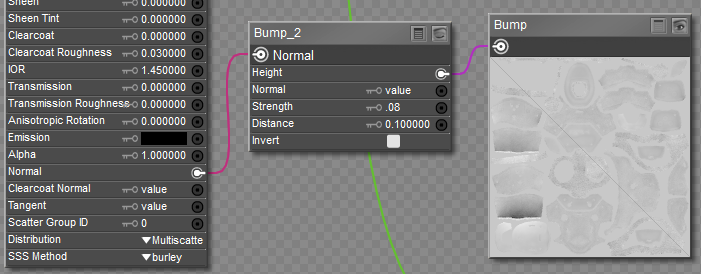
Connect the Bump map to a Bump node, and then to Normal input of Principled Surface node.
Continue to Kitty2 Textures-Principled.