Kitty2 Metallic Map-Physical
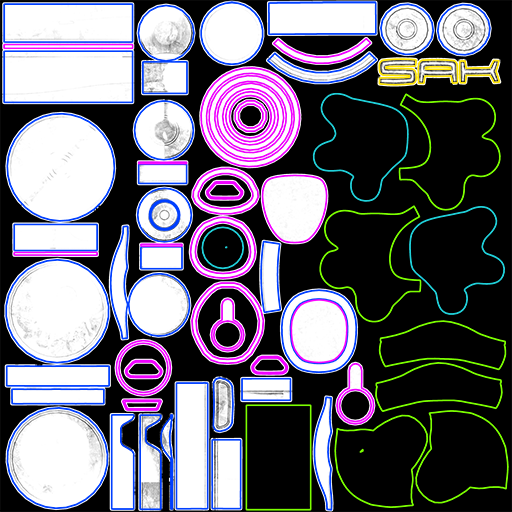
The Kitty2 metallic map identifies the metallic materials in white. Non-metallic materials are black.
Metallic materials in map 2 are used for the following materials:
- Logo: (Associated polygons outlined in yellow for clarity) - Polished Chrome
- Metal: (Associated polygons outlined in blue for clarity) - Polished Chrome
- Trim: (Associated polygons outlined in pink for clarity) - Scratchy Copper
There are three materials that use the Kitty2 set of textures that have metallic surfaces. You created these shaders in Kitty2 Base Textures-Physical, which currently have the color, roughness, and normal maps assigned to them. To add the metallic map, proceed as follows.
- Choose the Logo material, which uses the Kitty2 bases.
- Right-click in an empty space in the edit window and choose New Node > 2D Textures > image_map to add a new image map node.
- Double-click the image map node header, and change the name to Metallic.
- Click the Image Source field to open the Texture Manager. Browse to the Poser 13 Content > Included > Runtime > textures > SAKitty Tutorial folder and choose SAKitty2_Metallic for the metallic texture map.
- When you return to the Texture Manager, assign a Custom Gamma value of 1 to the texture. Choose OK to exit the texture manager.
- Connect the output of the metallic image map node to the Metallic input of the Physical Surface node, and set the Metallic value to 1.
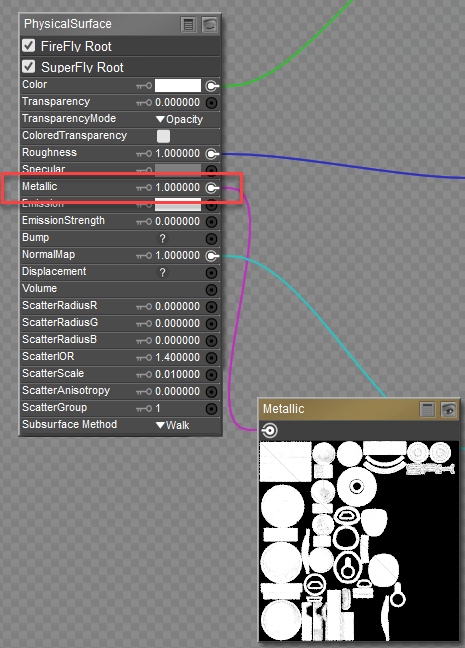
Connecting a Metallic map to Physical Surface Node
Now you will need to copy the Logo material over to the other two surfaces that use the metallic map:
- Right-click an empty space, and choose Select All and then right click again and choose Copy to copy the nodes to your clipboard.
- One at a time, select the following materials from the Materials list. Right-click and choose Select All to select the existing nodes, then right-click again and choose Replace to update them with the nodes in your clipboard:
- Metal: Polished Chrome
- Trim: Scratchy Copper
- All texture assignments for the Kitty2 set of textures are now complete. Continue to Kitty3 Metal, Emission and Opacity-Physical to finish.