Step 2: Cloth Controls
Now that you’ve created a simulator, your next step is to add cloth objects. Do this using the Cloth controls (area 2 of your screen).
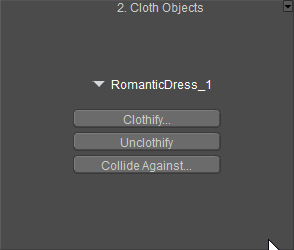
Cloth Objects settings.
Clothifying Objects
To turn an object into a dynamic cloth object, select it and click the Clothify button to open the Clothify window, which displays a list of objects eligible to be turned into dynamic cloth. Use the Object to clothify pull-down menu to select your desired object, and click the Clothify button to make the cloth object, or Cancel to abort.
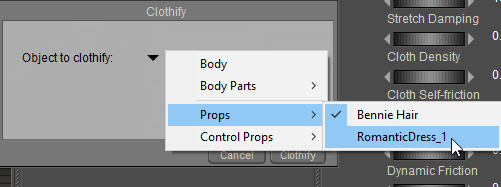
Choosing an object to clothify.
To turn a dynamic cloth object back into a normal prop, select it and click the Unclothify button. The prop will return to its pre-clothified shape, however it will retain its vertex groups and dynamic parameters, meaning you won’t have to start from scratch if you re-clothify the object later.
You can also create static props and morph targets from cloth objects as described in Creating Props and Morph Targets.
Specifying Collision Objects
Once the simulator is created and you’ve specified the basic parameters and created dynamic cloth, the next part of the simulator creation process is defining the objects that will use collision detection (collision objects) with the cloth. Each collision object will behave in accordance with the specified collision behaviors when contacting the cloth. Non collision objects will not use collision detection with the cloth object. To set up collision objects, click the Collide Against button to open the Cloth Collision Objects window.
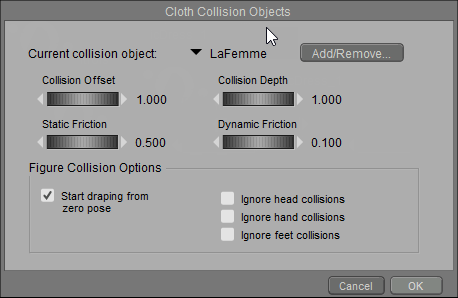
Choosing collision objects.
The Cloth Collision Objects window has the following options:
- Add/Remove Collision Objects: Clicking the Add/Remove button opens the Select Objects window, which displays a hierarchical list of all the objects in your scene, including body parts on figures. By default, all scene objects are selected (selected objects are checked). Add and remove collision objects by checking/clearing the checkboxes next to each object listing in the window, then click the OK button to accept your choices or Cancel to abort. Added objects appear in the Current Collision Object pull-down menu in the Cloth Collision Objects window. You can set collision options for each collision object by selecting it using the pull-down menu and specifying the desired settings.
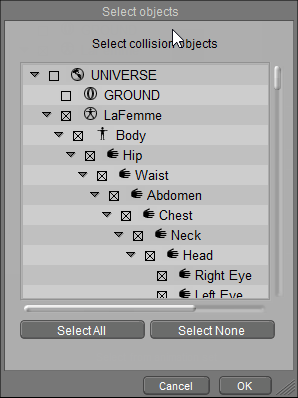
Select the object to collide against in the Select Objects dialog.
- Collision Offset: The Collision Offset parameter determines the distance between a cloth object and a collision object at which the collision detection calculations begin. Increasing this value can help avoid accidental collisions, especially during animations, because Poser requires a little time to calculate actual collisions. Increasing this value too high can consume extra computing resources. Experimentation will quickly yield the proper value for each simulation. Please see Collision_Offset_&_Depth for more information.
- Collision Depth: The Collision Depth parameter specifies how close the cloth object must be to a collision object in order for a collision to take place. Increasing this value increases the distance at which the cloth and collision object will collide. This is useful when creating clothing, because the cloth will be kept away from the figure. Increasing this distance makes the cloth appear more static but avoids having body parts penetrate the cloth (such as a leg poking through a skirt). Experimentation will quickly yield the proper value for each simulation. Please see Collision_Offset_&_Depth for more information.
- Static Friction: The Static Friction parameter sets the coefficient of friction for the collision object. This is similar to the Dynamic Friction parameter except that this is the force required to get a stationary cloth in contact with a solid to start moving. For example, nylon over smooth plastic will have a very low amount of static friction while denim over wood will have a high amount. You can use the Collision Friction checkbox (see below) to use the collision object’s value or the simulation’s value.
- Dynamic Friction: The Dynamic Friction parameter sets the coefficient of friction for the collision object when the object is in motion. Moving a piece of cloth across a surface causes friction. Silk moving over a steel surface has low resistance, while cotton moving over skin or coarse sandpaper over rough wood has high resistance. You can use the Collision Friction checkbox (see below) to use the collision object’s value or the simulation’s value.
- Figure Collision Options: The Figure Collision Options allow you to specify how the current cloth object will behave when it drapes across/collides with a figure. Most clothes dressed on a figure are modeled in such a way so that they will fit on the target figure when the figure is in default pose. However, most simulations including figures and dresses will not use figure’s default pose at the start of simulation. In order for the simulation to work correctly, we need to simulate the cloth draping process: given certain frames, the underlying figure will interpolate from default pose to the start pose, and the draping simulation ensures the cloth fits the figure at the start frame.
- Start Draping From Zero Pose: Checking the Start draping from zero pose checkbox is used when creating cloth to be used as clothing on a figure. For example, you can convert conforming clothing into dynamic cloth objects and drape them over a figure beginning from that figure’s default pose. This is useful when applying dynamic cloth to a posed figure.
- Ignore Head Collisions: Checking the Ignore head collisions checkbox causes the collision detection not to apply when the cloth collides with a figure’s head. This is useful for cloth that will not normally touch the head, such as shirts, pants, etc.
- Ignore Hand Collisions: Checking the Ignore hand collisions checkbox causes the collision detection not to apply when the cloth collides with a figure’s hands.
- Ignore Feet Collisions: Checking the Ignore feet collisions checkbox causes the collision detection not to apply when the cloth collides with a figure’s feet.
Adding collision objects increases the computing resources required to calculate cloth behavior and dynamics. Thus, you should specify the minimum number of collision objects possible.
When you have finished setting up the collision objects, click OK to accept your choices or Cancel to exit without setting up collision objects.
The arrow at the top right of the Cloth area displays the currently selected cloth object. Clicking this arrow opens a pull-down menu allowing you to select any of the cloth objects in your scene for modification.
Collision Offset & Depth
The Collision depth and Collision offset dials are limited to minimum 0.1cm and maximum 10cm.
Before adjusting these settings, be sure to enable the Object vertex against cloth polygon and Object polygon against cloth polygon options in the Simulator Settings dialog.
A real piece of cloth has two sides (inside & outside) and thickness. A cloth mesh is composed of polygons, which mathematically have zero thickness. The Collision Depth and Collision Offset dials emulate thickness by “extruding” the cloth inwards by the amount of Collision depth units and outward by the amount of Collision offset units. Thus, the cloth now has a “thickness” of collision offset + collision depth. Any specified collision object intersecting this volume will be treated as a collision.