The Display Menu Commands
As the name implies, the Display menu controls how items appear in your Poser workspace, specifically within the Document.
- Camera View: Choose Display > Camera View to select one of the cameras available in your scene. See Cameras for more information about the various camera views.
- Camera Layout: Choose Display > Camera Layout to select the number of different views that you want to display in the document window. See Single/Multiple-View Panes for more information about multiple views.
- Fly Around: This command puts the current camera in Flyaround mode. For more information, see Flyaround View.
- Frame Selected: The Frame Selected command fits the camera view around the currently selected actor. See Frame_Selected.
- Orbit Selected: The Orbit Selected command rotates the camera around the currently selected actor. See Orbit_Selected.
- Show Camera Names: Selecting Display > Show Camera Names displays the name of the currently selected camera in the top left corner of the Document’s scene preview area. Clicking this option again disables this feature.
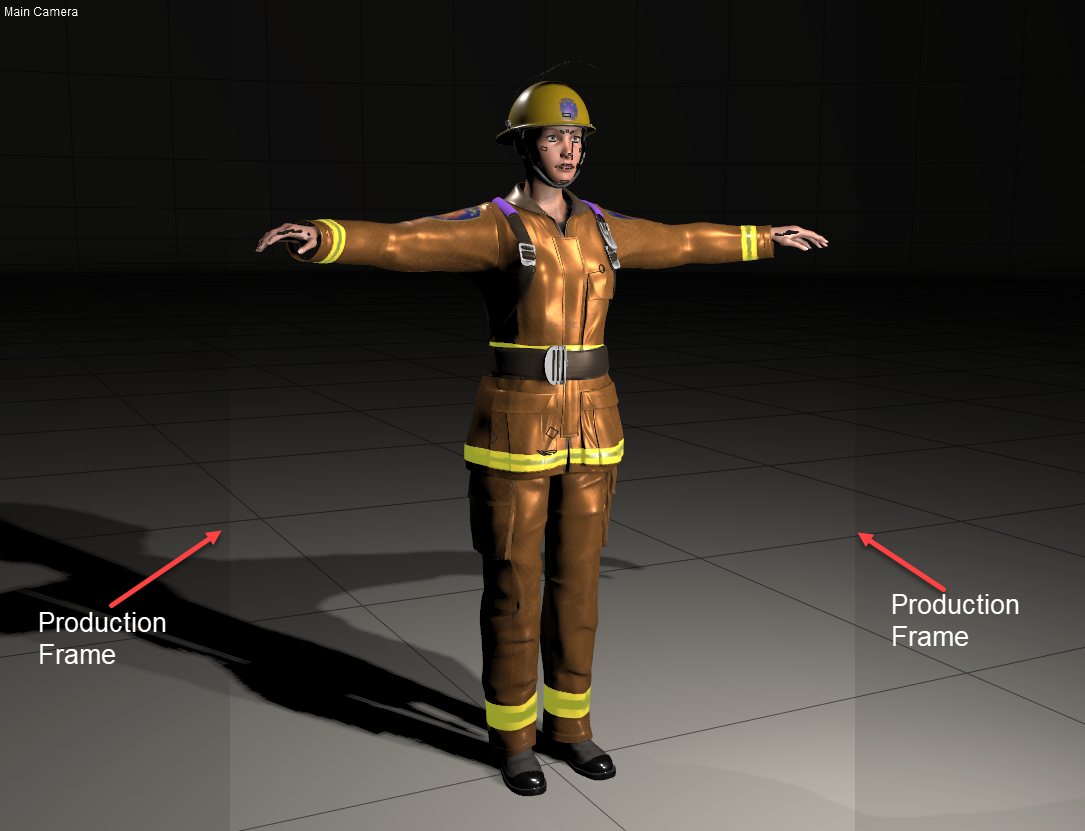
- Production Frame: Selecting Display > Production Frame allows you to specify whether you wish the production frame to be visible in the Document’s scene preview. The size of the production frame is determined by the aspect ratio resulting from the output width and height. See Render Dimensions and Rendering Animations for more information about configuring the output dimensions for images and movies, respectively.

The Production Frame
- Document Style, Figure Style and Object Style: See Display Controls
- Depth Cued: Depth Cueing adds dimension to scene elements visible in the Document. When Depth Cueing is enabled, elements farther away from the camera fade into the distance. See Using Depth Cueing.
- Tracking: Selecting Display > Tracking allows you to set your desired tracking mode. Please refer to Tracking Mode for more information about tracking modes.
- Deformers: Shows or hides the deformers in your seen. For more information, see Using Deformers.
- Ground Shadows: Displays shadows on the ground only. For more information see Shadows.
- Figure Circle: Toggles display of a circle around your currently selected figure in your scene, which turns red depending on cursor location, allowing you to select the entire figure. Please refer to Full Figures Context Menu for more information about the Figure Circle.
- Bend Body Parts: When enabled, adjacent body parts blend together when bent. When disabled, body parts appear to split apart when bent. See Bend Body Parts for more information.
- Foreground/Background Color: Selecting Display > Foreground Color or Display > Background Color allows you to specify the Document’s foreground and background colors, respectively. You can also do this using the Color controls located next to the Document. Please refer to Colors for an explanation of foreground and background colors.
- Show Background Picture: If you have a background image in your scene that was placed there using either the File menu or by pasting the current figure/prop into the background, then selecting Display > Show Background Picture toggles displaying this image on and off.
- Clear Background Picture: Selecting Display > Clear Background Picture deletes the currently displayed background image (if any).
- Paste Onto Background: See Paste Onto Background
- Show Background Footage: Selecting Display > Show Background Footage displays imported animation footage in the workspace background.
- Clear Background Footage: Selecting Display > Clear Background Footage removes imported animation footage from your scene.
- Use Background Shader Node: See Use Background Shader Node.
- Guides: See Guides
- Preview Drawing: Selecting Preview Drawing allows you to specify whether you wish to use OpenGL hardware rendering, or SreeD software rendering, for your scene preview display. Please see OpenGL Hardware Acceleration for more information about hardware versus software rendering.
- Cartoon Settings: See Cartoon Settings
- Measurement Mode: See Measurement Mode